iot lab Workshop
iot lab work shop
This project is maintained by DanielYEHsieh
Build the code on your laptop
Clone the repository
Main code can be found on the repository page: github.com/aws/amazon-freertos
git clone https://github.com/aws/amazon-freertos.git --recurse-submodules
Note: from now on, we’ll assume your bash is in the workshop folder
Setup your credentials
Create the aws_clientcredential_keys.h
Navigate to https://yona75.github.io/credformatter/, upload your Certificate and Private key that you downloaded in the previous step and generate an aws_clientcredential_keys.h file.
Copy aws_clientcredential_keys.h to project
Copy the file to ./amazon-freertos/demos/include/ directory by dragging it there
Edit aws_clientcredential.h
Open the aws_clientcredential.h file by double-clicking on it. And change the following values:
...
#define clientcredentialMQTT_BROKER_ENDPOINT "[YOUR AWS IOT ENDPOINT]"
...
#define clientcredentialIOT_THING_NAME       "[THE THING NAME YOU CREATED]"
...
#define clientcredentialWIFI_SSID            "[YOUR WIFI SSID]"
...
#define clientcredentialWIFI_PASSWORD        "[YOUR WIFI PASSOWRD]"
...
#define clientcredentialWIFI_SECURITY        eWiFiSecurityWPA2
...
Note: clientcredentialWIFI_SECURITY is defined without double quotes
Connect your board to your laptop
Find the USB device
ls /dev/cu.*
Should return something like: /dev/cu.SLAB_USBtoUART
Make a note of the “/dev/cu.SLAB_USBtoUART” (copy)
Configure the code
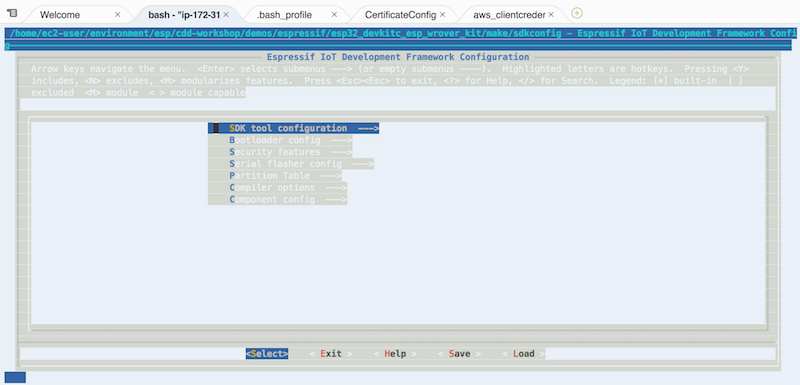
Run make menuconfig and configure the serial port.
cd ./amazon-freertos/vendors/espressif/boards/m5stickc/aws_demos

make menuconfig
- Select “Serial flasher config”
- Set the serial port to: [YOUR /dev/cu….]
- Save and then Exit
Compile, flash and monitor the code
make all -j4 && make flash && screen /dev/cu.... 115200 -L
Note: replace /dev/cu…. by your specific serial port