iot lab Workshop
iot lab work shop
This project is maintained by DanielYEHsieh
Lab2: Just in Time Registeration with Greengrass
overview
In this lab you will:
-
Create an EC2 instance
-
InstallAWS CLIand configure on the EC2 instance you’ve created
-
Use openssl on EC2 to create your certs and import your CA to AWS IoT
-
Create a lambda function and IoT Action to provision Greengrass in AWS IoT
-
Install and start greengrass with the certs you’ve created in step 3
-
Verifiy in AWS IoT Console that the group is successfully created/provisioned and then deploy the greengrass group
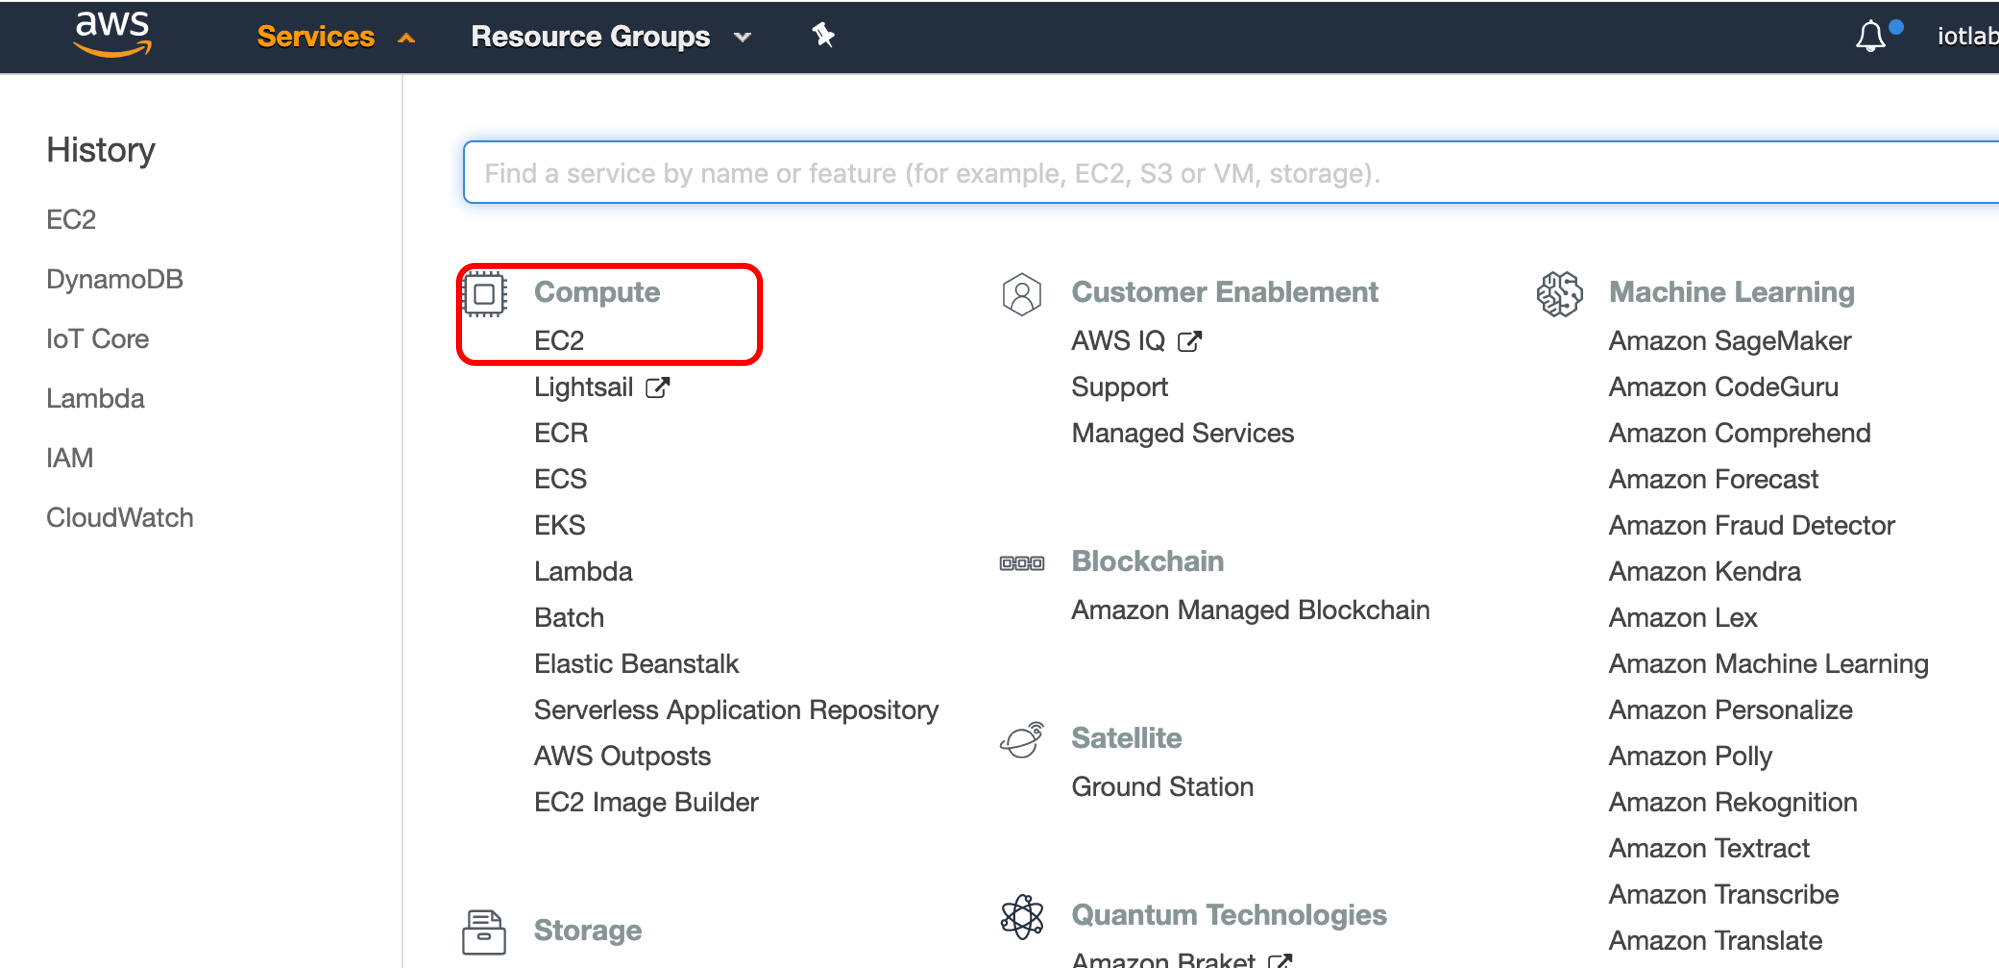
Create an EC2 instance
starting by launching your EC2 instance
-
naviage to EC2 console as following
-
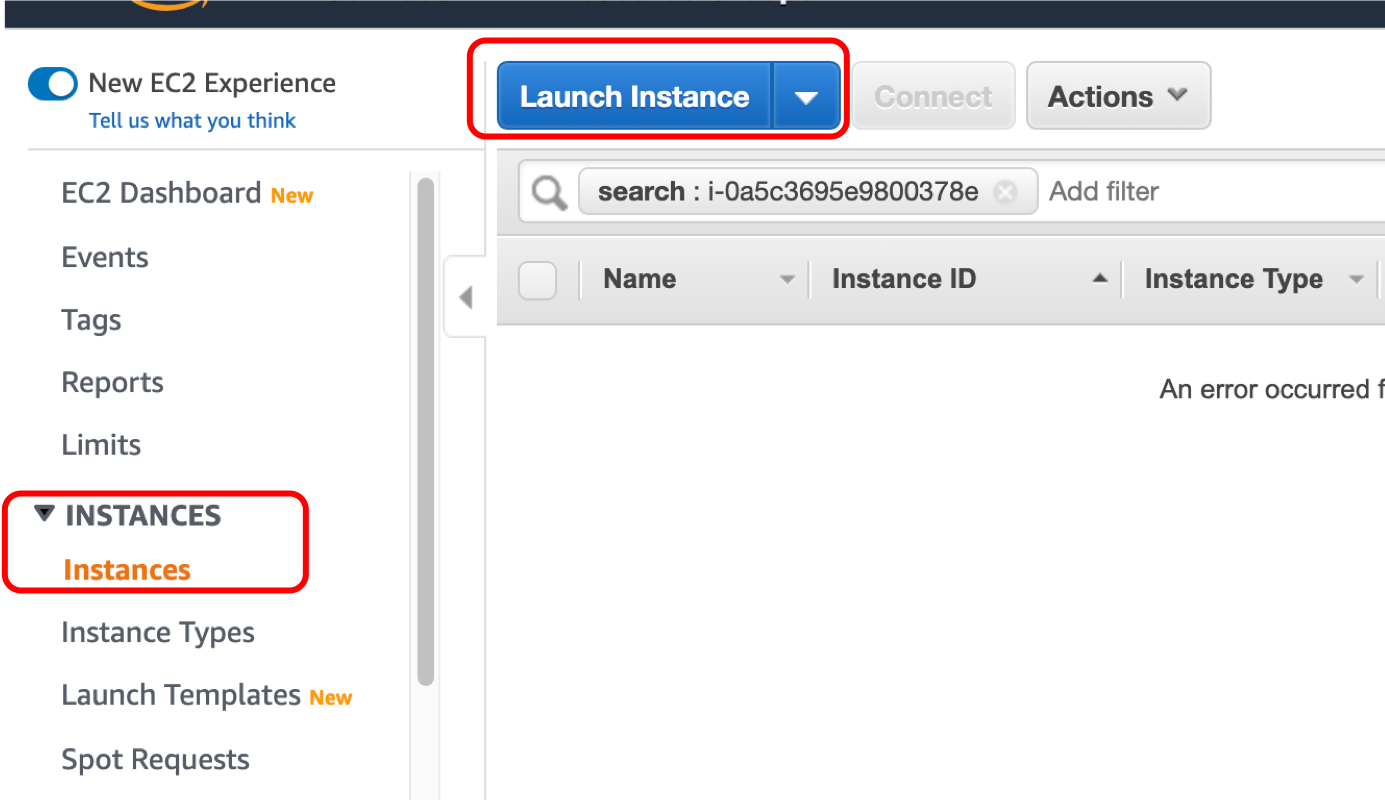
launch your EC2 instance
-
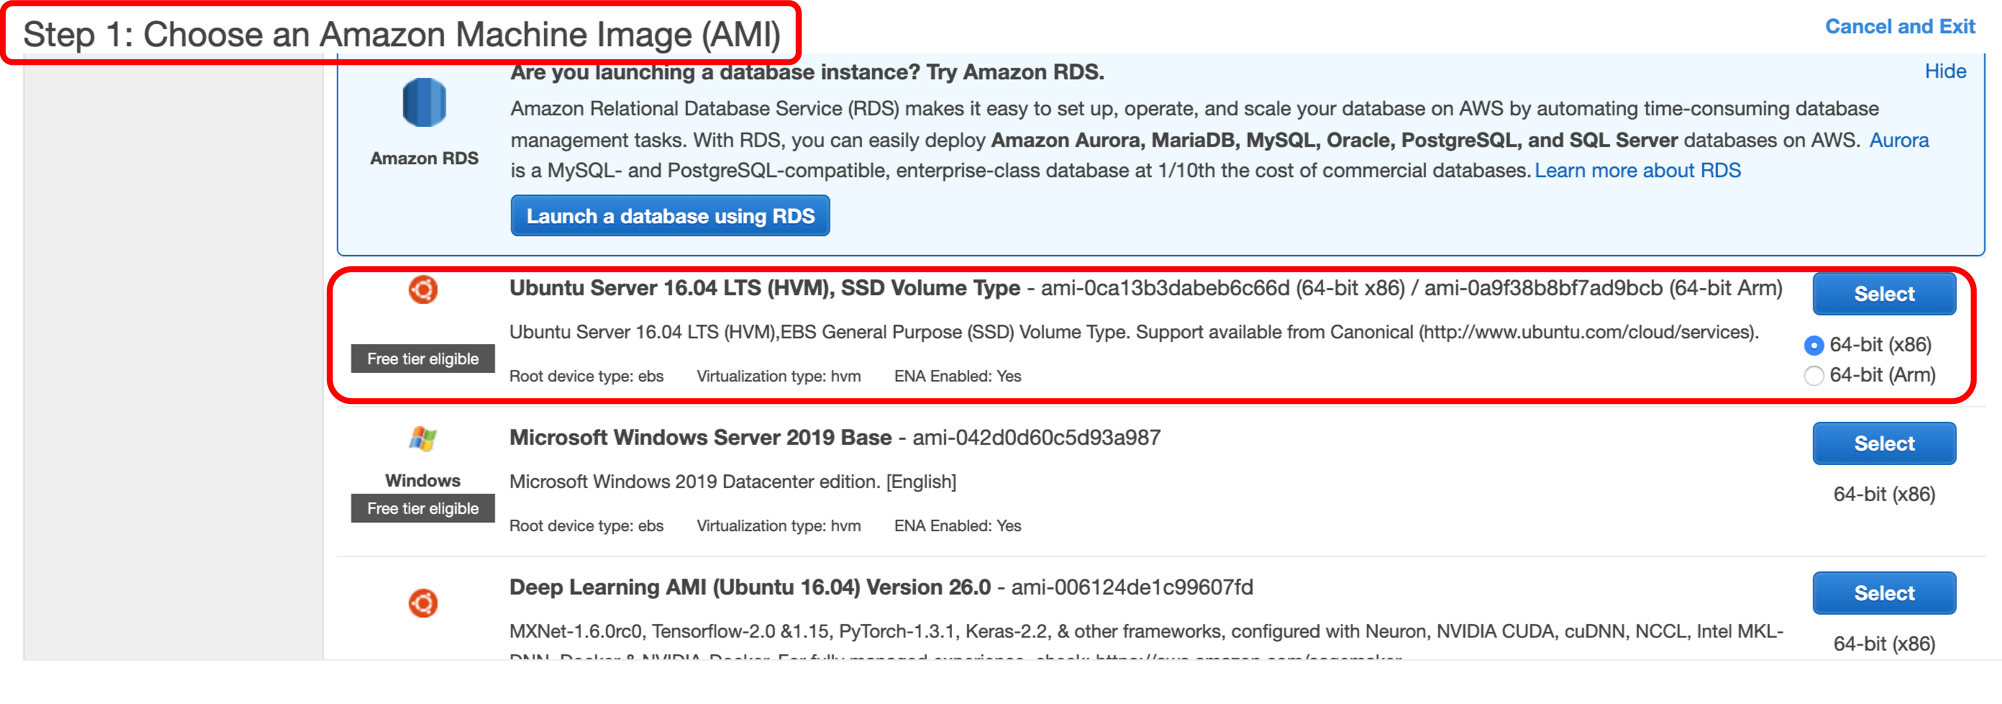
slelect ubuntu image for your EC2 machine
-
walk through the setup for your EC2
- step 2: Choose Instance Type : t2.small then click review and launch
- Step 7: Review Instance Launch
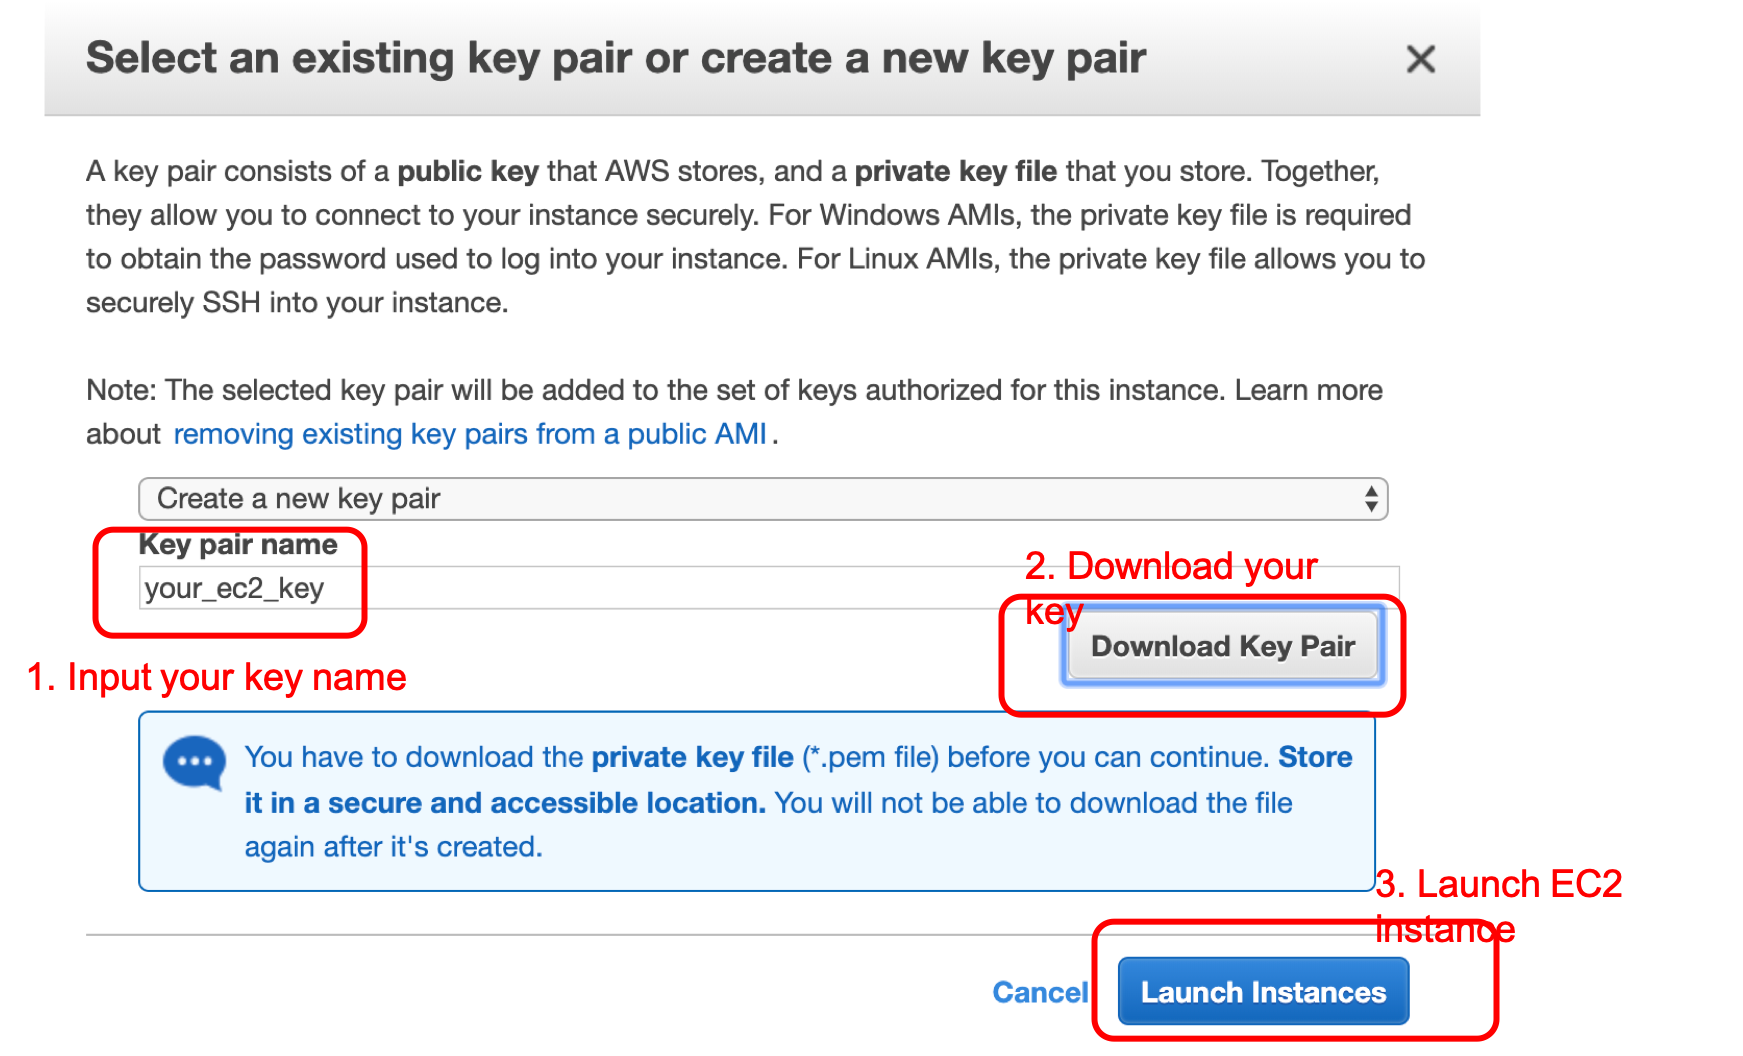
- Save key and launch
Install AWS CLI on the EC2
starting by launching your EC2 instance
- connect, login to your EC2 instance
Connect to your Amazon EC2 instance.
In the navigation pane, choose Instances, choose your instance, and then choose Connect.
Follow the instructions on the Connect To Your Instance page to connect to your instance by using SSH and your private key file.
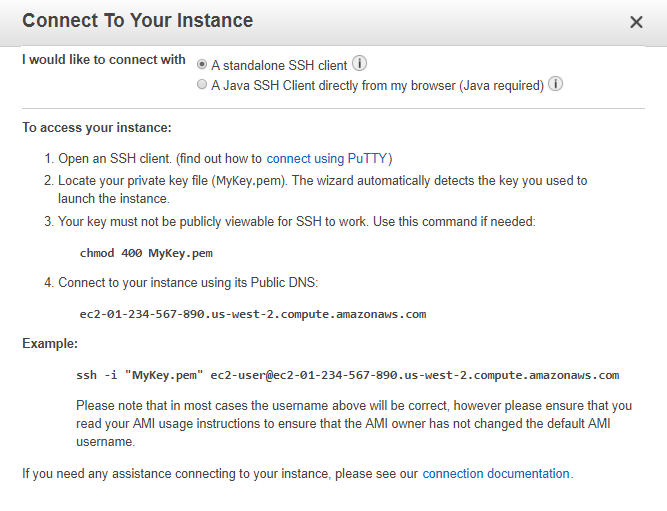
You can use PuTTY for Windows or Terminal for macOS. For more information, see Connect to Your Linux Instance in the Amazon EC2 User Guide for Linux Instances.
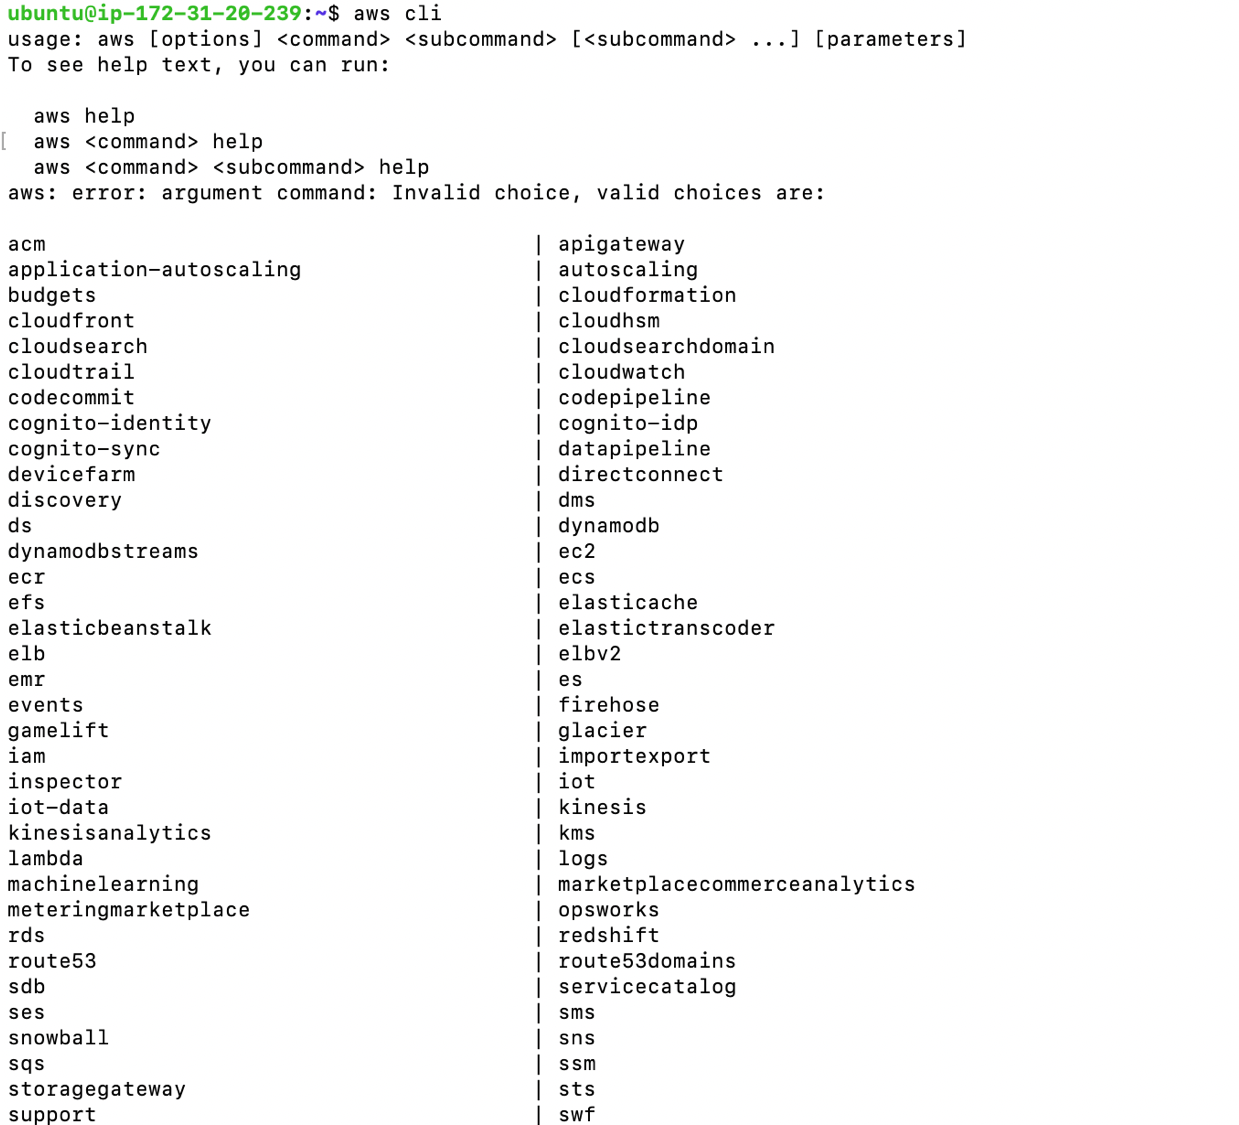
- InstallAWS CLI
aws cli
in the terminal, input above cmd and check if the following menue prompts
make sure when your aws creadentials and configure are prperly set
ubuntu@ip-172-31-20-239:~$ cat ~/.aws/credentials
[default]
aws_access_key_id = XXXXXYour_IAM_user_key_idXXXXXX
aws_secret_access_key = XXXXXYour_IAM_user_keyXXXXXX
ubuntu@ip-172-31-20-239:~$ cat ~/.aws/config
[default]
output = text
region = ap-southeast-1
Use openssl on EC2 to create your certs and import your CA to AWS IoT
You will do the following on your EC2 machine:
- loging to your EC2 machine created in step1
- Create, register, and activate a CA certificate that will be used to sign your device certificate.
- Enable auto-registration of certificates.
- Create device certificates signed by the CA and install them on your device.
Registering Your CA Certificate
Let’s start by using openssl in a terminal to create your sample CA certificate. This sample CA certificate is used later in the walkthrough to sign a device certificate that you register with AWS IoT:
$ openssl genrsa -out sampleCACertificate.key 2048
$ openssl req -x509 -new -nodes -key sampleCACertificate.key -sha256 -days 365 -out sampleCACertificate.pem -extensions v3_ca
The registration workflow first requires retrieving the registration code. You can use the AWS CLI or the Register Certificate section in the AWS IoT console to get the registration code.
$ aws iot get-registration-code
This command will return a randomly generated, unique registration code that is bound to your AWS account. This registration code is long-lived. It does not expire until you delete it.
$ openssl genrsa -out privateKeyVerification.key 2048
$ openssl req -new -key privateKeyVerification.key -out privateKeyVerification.csr
During the CSR creation process, you will be prompted for information. Enter the registration code into the Common Name field of the verification certificate:
...
Organization Name (eg, company) []:
Organizational Unit Name (eg, section)
Common Name (e.g. server FQDN or YOUR name) []: XXXXXSAMPLEREGISTRATIONCODEXXXXX
EMAIL ADDRESS []:
The registration code establishes that the generated verification certificate was created specifically for registering the CA certificate with AWS IoT, and that the verification certificate is not a previously issued certificate.
Now that you have a CSR that includes the registration code, use your first sample CA certificate and the CSR to create a new certificate:
$ openssl x509 -req -in privateKeyVerification.csr -CA sampleCACertificate.pem -CAkey sampleCACertificate.key -CAcreateserial -out privateKeyVerification.crt -days 365 -sha256
Next, you will use the verification certificate to register your sample CA certificate:
$ aws iot register-ca-certificate --ca-certificate file://sampleCACertificate.pem --verification-certificate file://privateKeyVerification.crt
You can make a describe-ca-certificate call to get the information on the registered CA certificate.
$ aws iot describe-ca-certificate --certificate-id <certificateId>
Next, you will activate the CA certificate with following cmd
$ aws iot update-ca-certificate --certificate-id <certificateId> --new-status ACTIVE
By default, the auto-registration-status of the registered CA certificate is disabled, use following cmd to enable the auto-registration-status
$ aws iot update-ca-certificate --certificate-id <caCertificateId> --new-auto-registration-status ENABLE
Create Device Certificate Signed by Your CA Certificate
Enter the following commands in your terminal to create a device certificate:
$ openssl genrsa -out deviceCert.key 2048
$ openssl req -new -key deviceCert.key -out deviceCert.csr
$ openssl x509 -req -in deviceCert.csr -CA sampleCACertificate.pem -CAkey sampleCACertificate.key -CAcreateserial -out deviceCert.crt -days 365 -sha256
Create a certificate file that contains the device certificate and its registered CA certificate. Here is the Linux command:
$ cat deviceCert.crt sampleCACertificate.pem > deviceCertAndCACert.crt
Create a lambda function and IoT Action to provision Greengrass in AWS IoT
you will do the following:
- create a policy for your lambdafunction role
- create a role and attach the policy you’ve created
- create a lambda function with the role you’ve created
- create a rule(Act) in AWS IoT
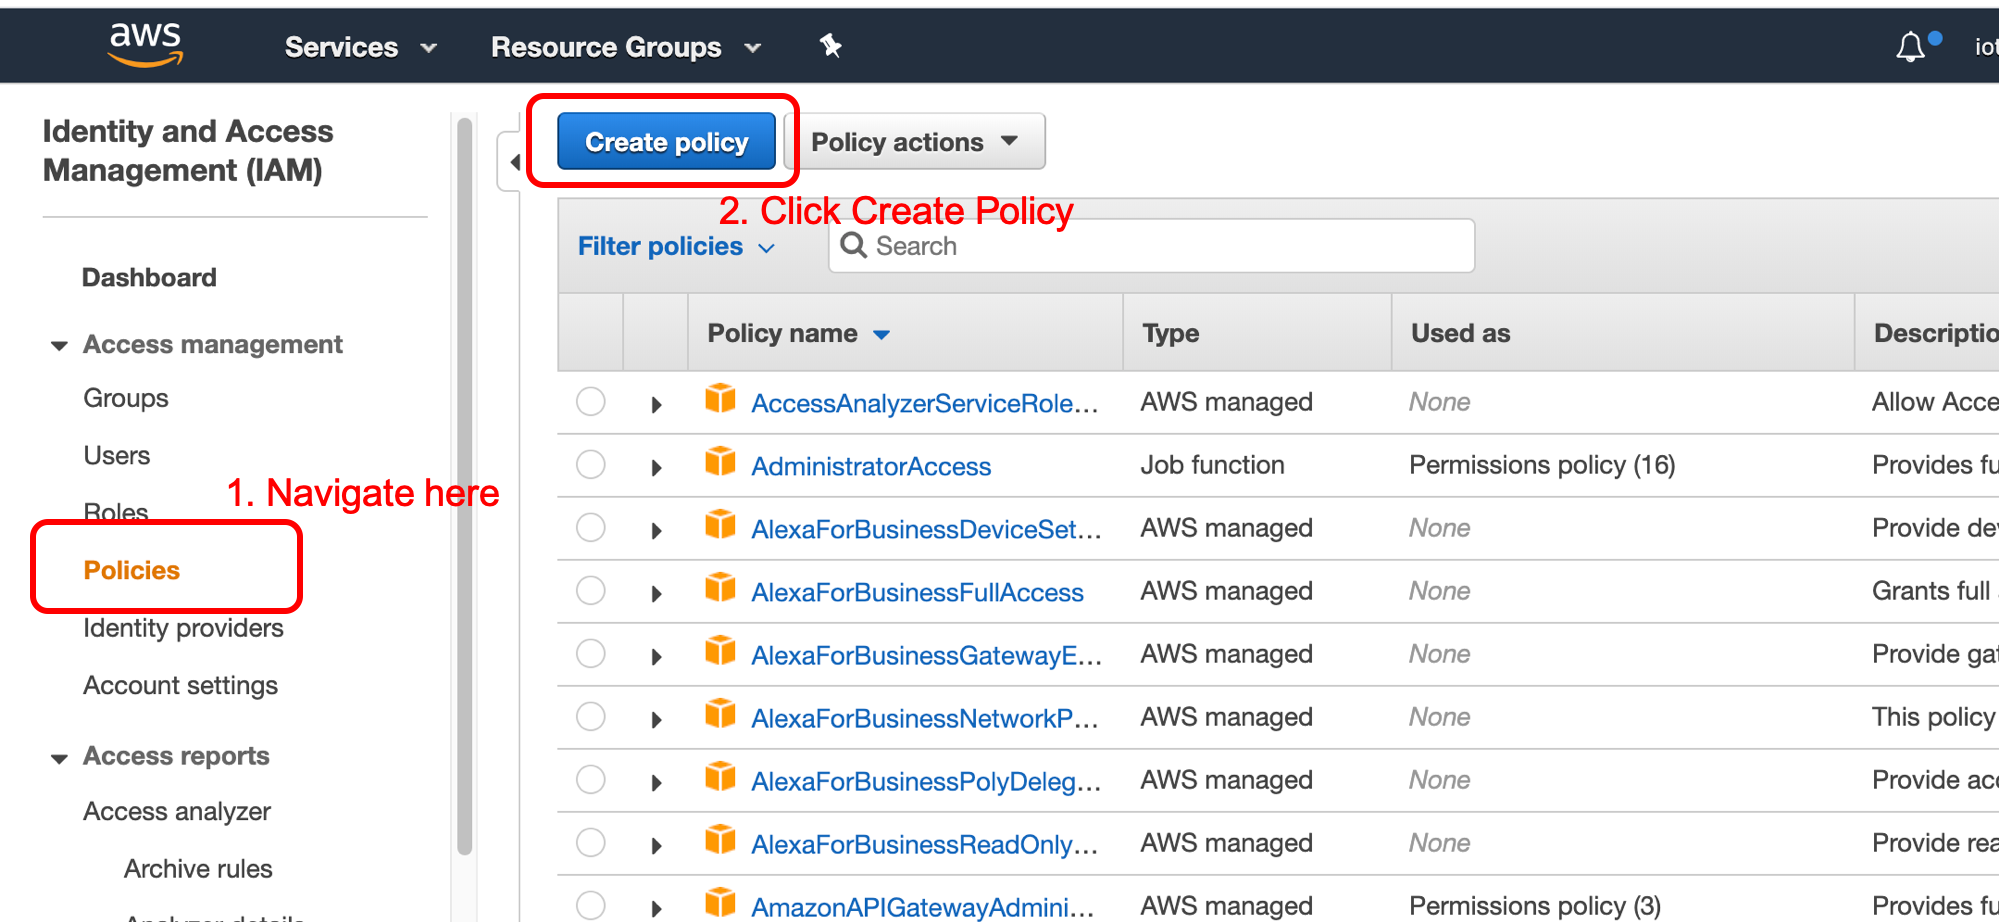
create a policy for your lambdafunction role
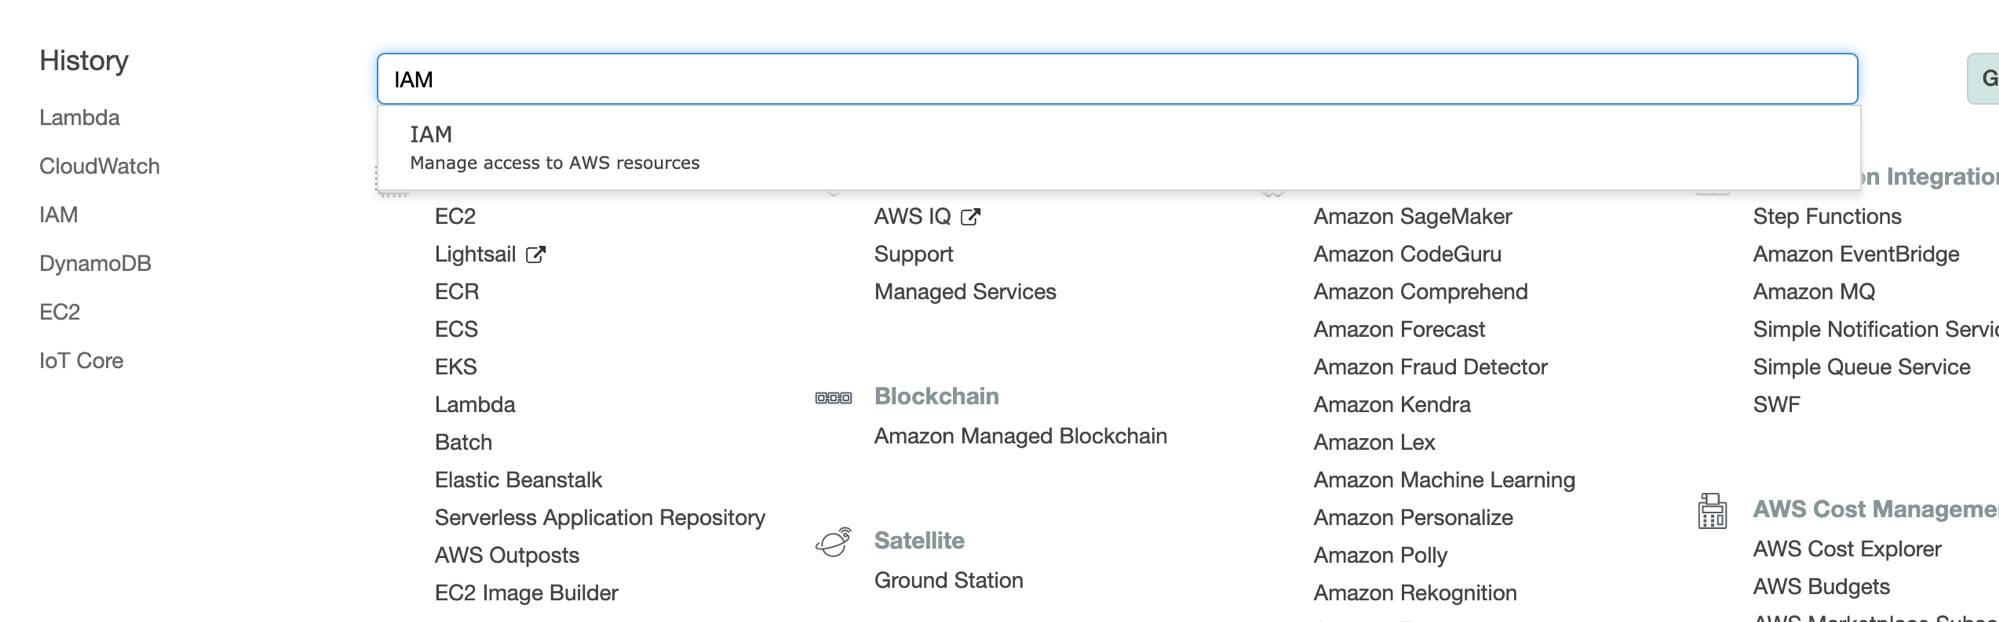
First, loging to IAM
Now, let’s start with create the policy
Next, input the policy template
- (please noted that there permission here is for workshop purpose, and if you would like to give access for lambda to output log in CloudWatch, you will need to give further acess)
{
    "Version": "2012-10-17",
    "Statement": [
        {
            "Effect": "Allow",
            "Action": [
                "iot:*",
                "greengrass:*"
            ],
            "Resource": "*"
        }
    ]
}
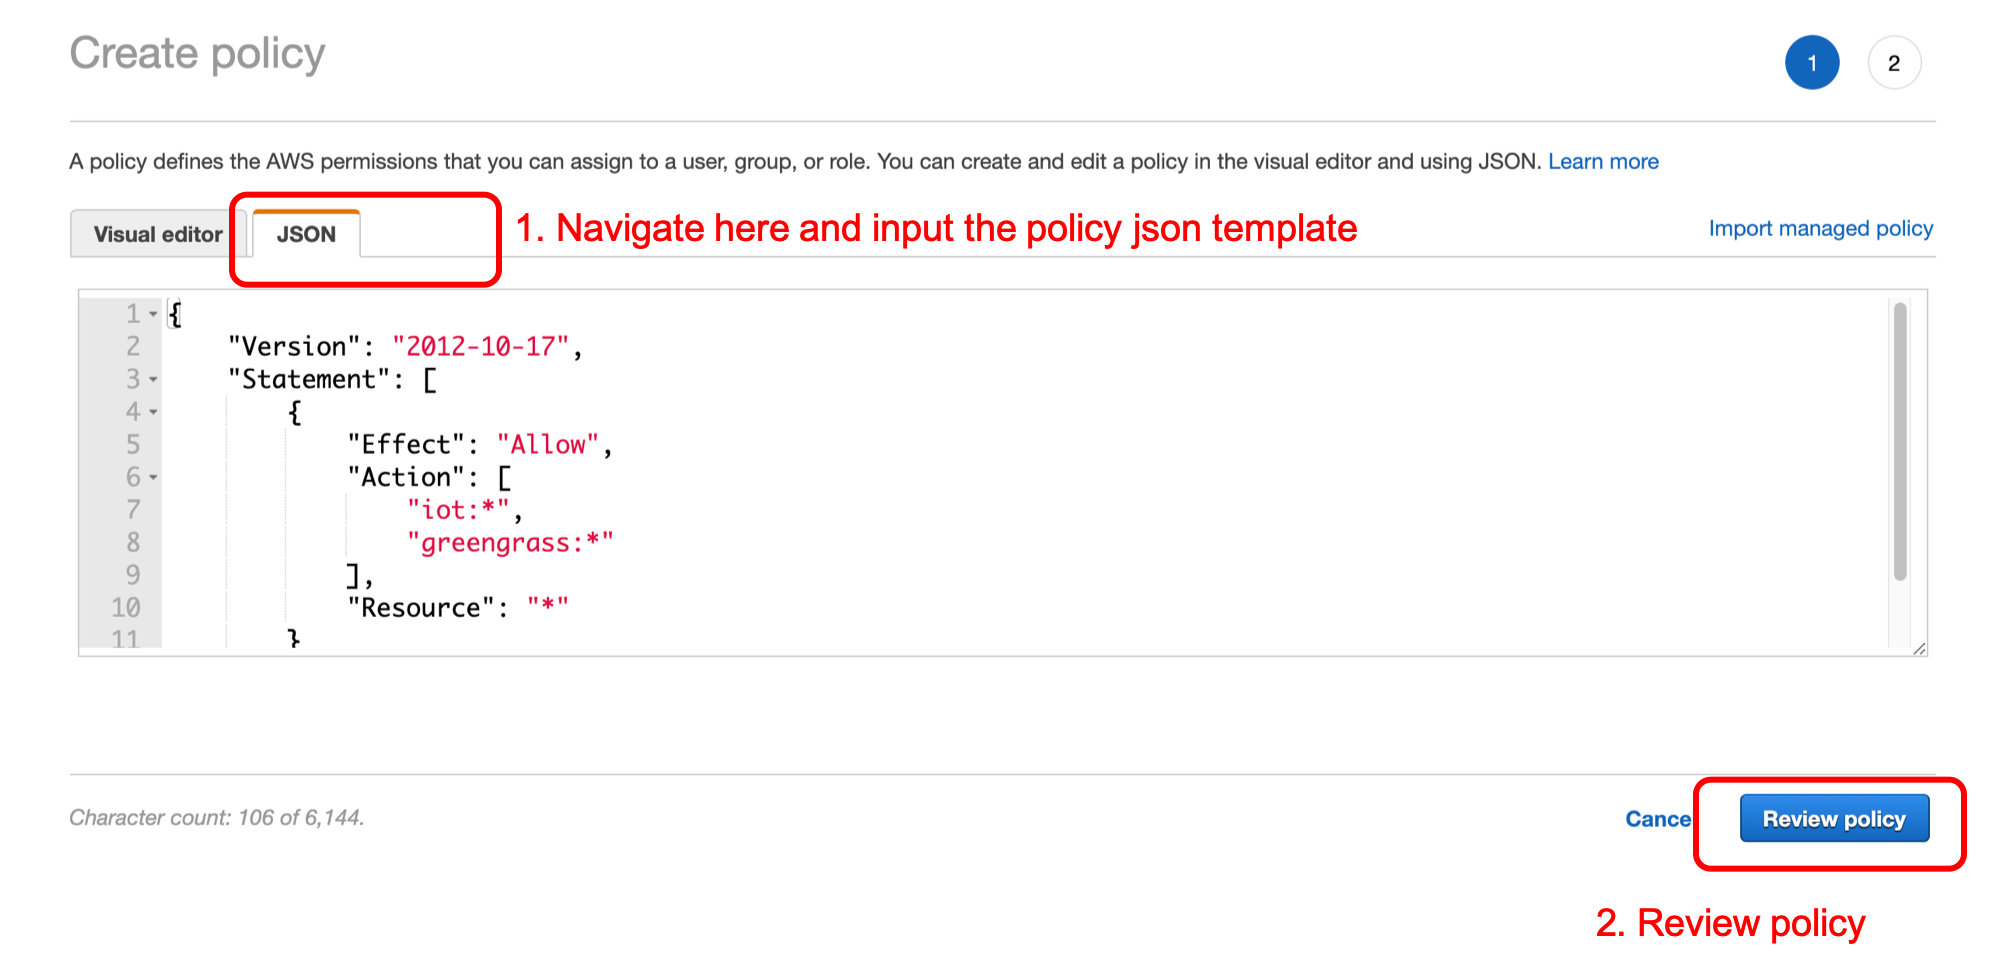
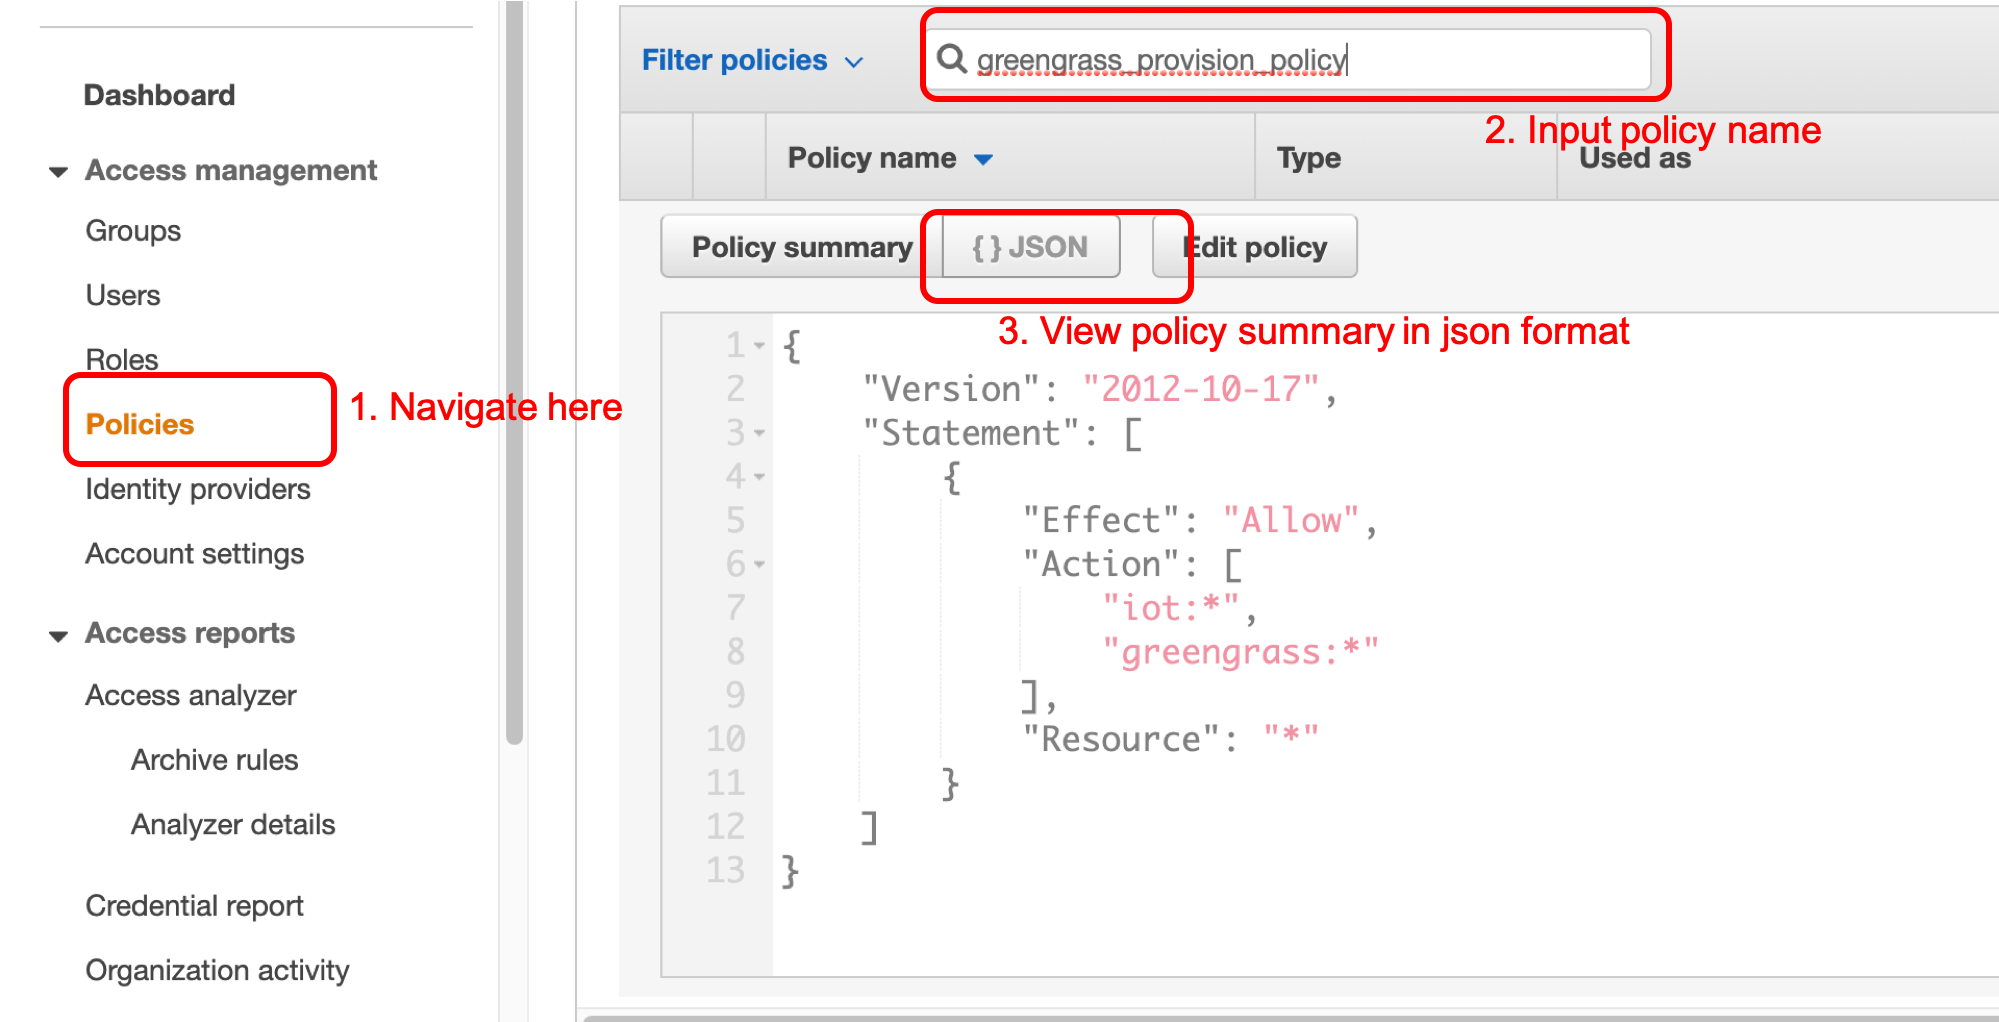
Next, in the Review policy page:
Name input greengrass_provision_policy and clikc Create Policy
Finally, verifiy your policy
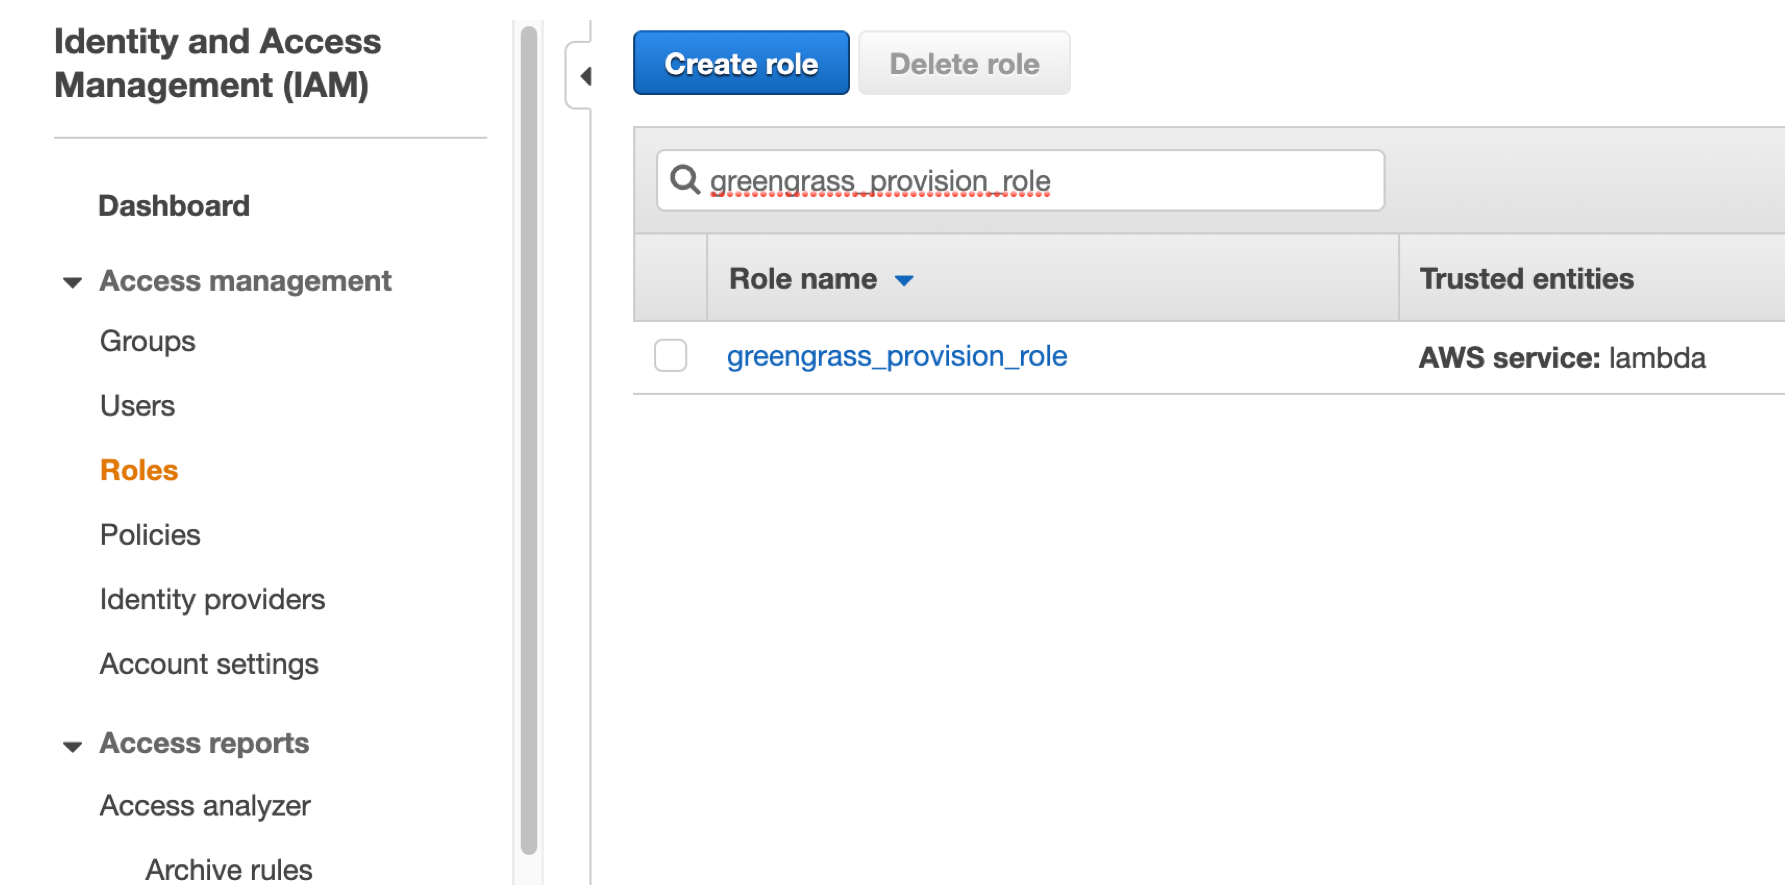
create a role and attach the policy you’ve created
like the first few steps in creating policy, first login to IAM, and this time navigate to Roles and click Create role
Next, Choose a use case Make sure you’ve choosed Lambda, it should look like this

Click Next: Permissions attach greengrass_provision_policy and click Next: Tags
Keep it blanked and click Next: Review
Role name input greengrass_provision_role and click Create role
Now, verify your role, it should have greengrass_provision_policy
create a lambda function with the role you’ve created
- Sign in to the AWS Management Console and open the AWS Lambda console
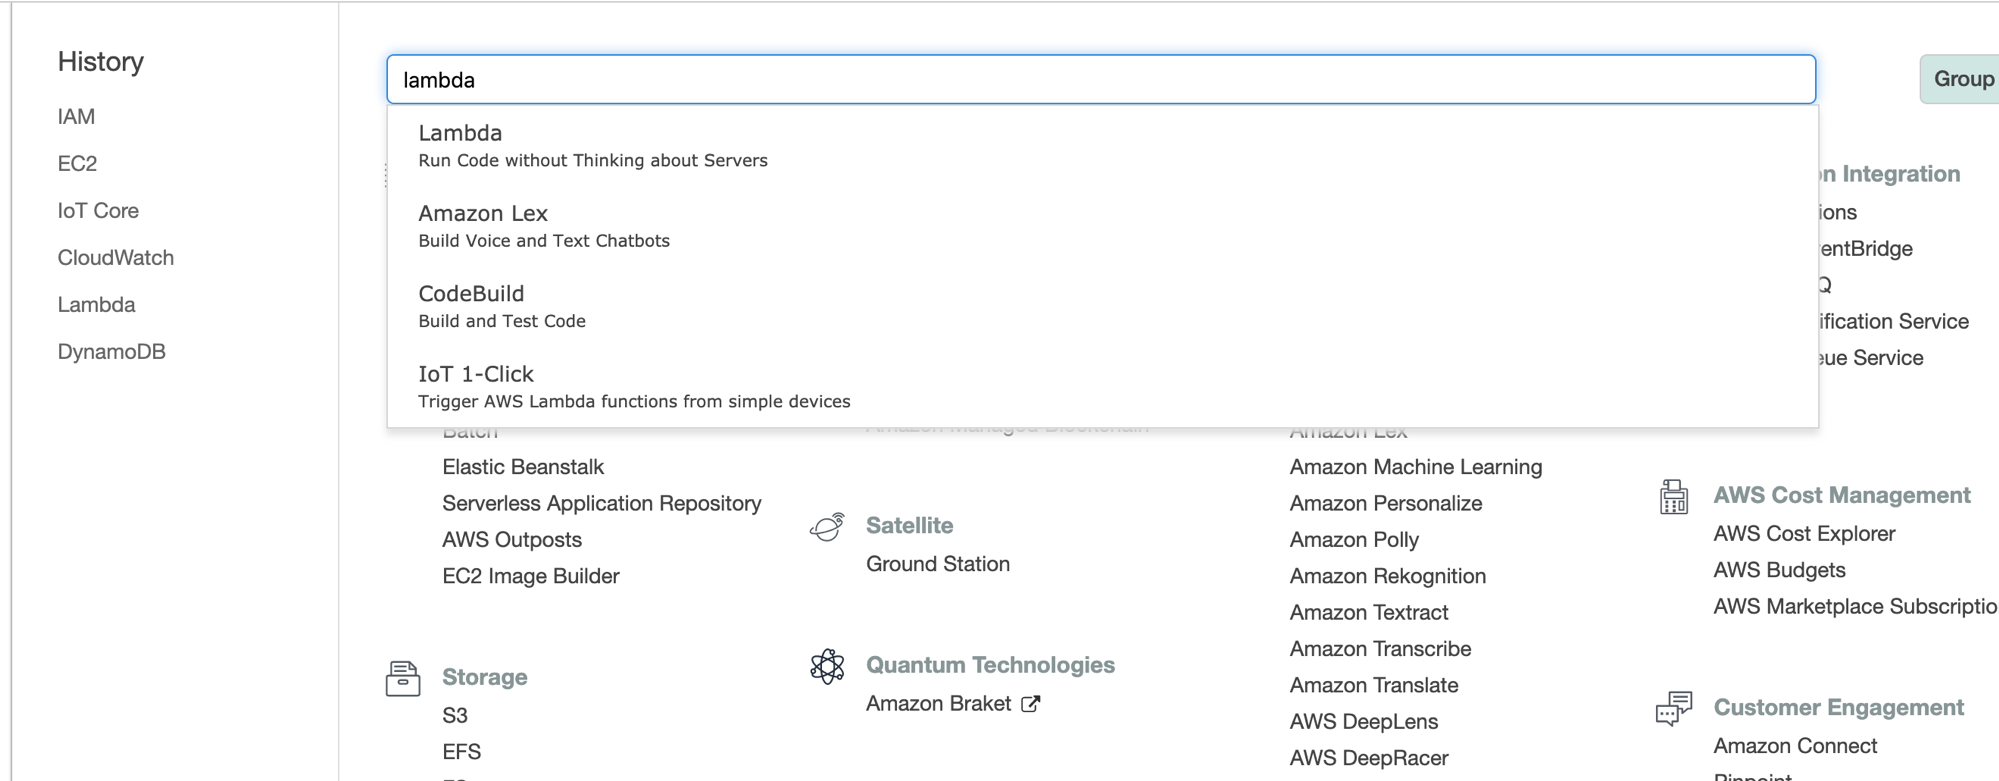
- Choose Create an AWS Lambda function.
-
On the Configure function page, type a name (jitr-gg-create-lambda) and description for the AWS Lambda function. In Runtime, choose python 3.6 or 3.8.
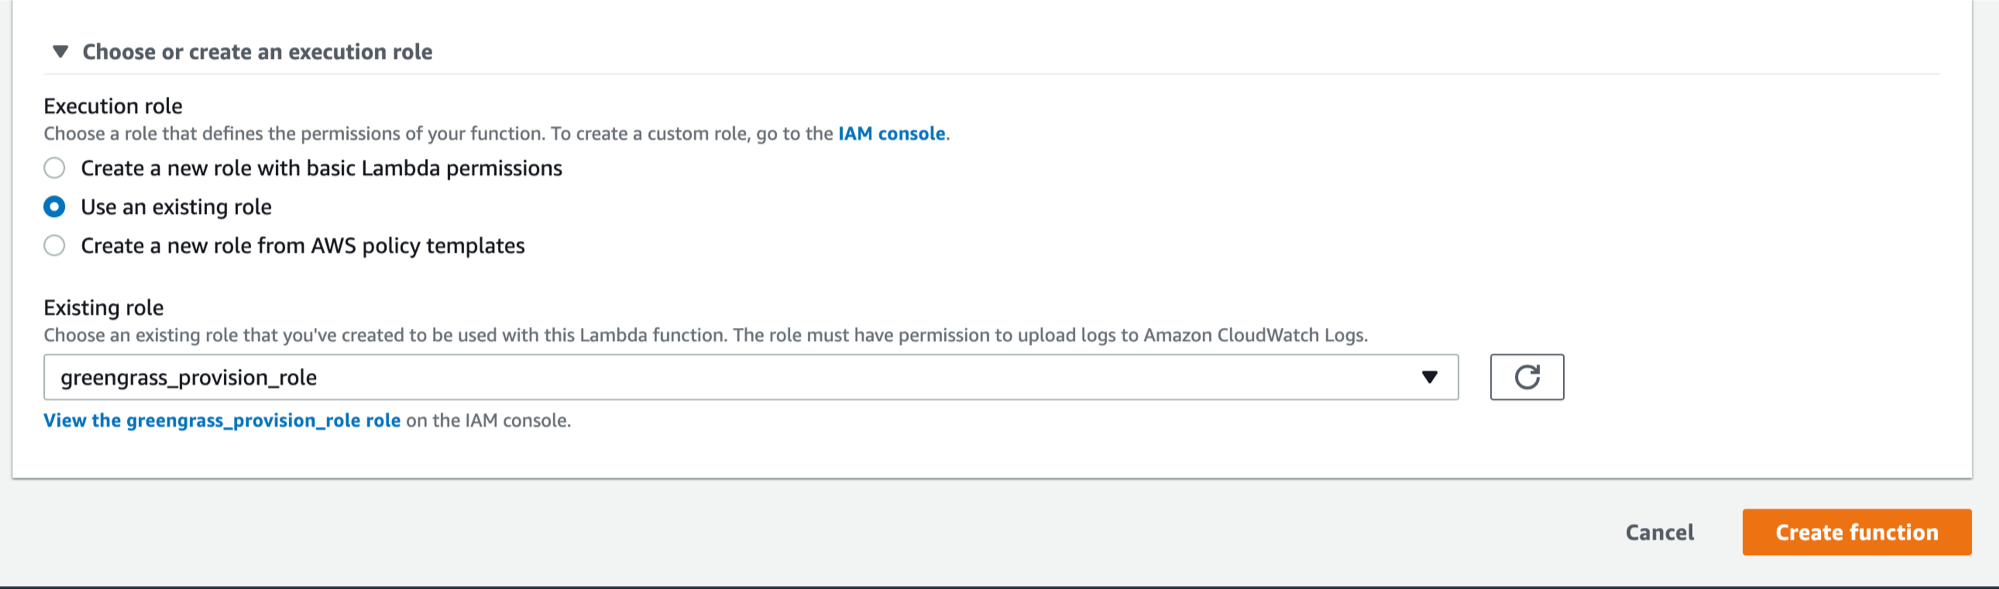
- Scroll down to the AWS Lambda function handler and role section of the page. For Role, choose Use an existing role. And in Existing role, scroll down and choose greengrass_provision_role and click create
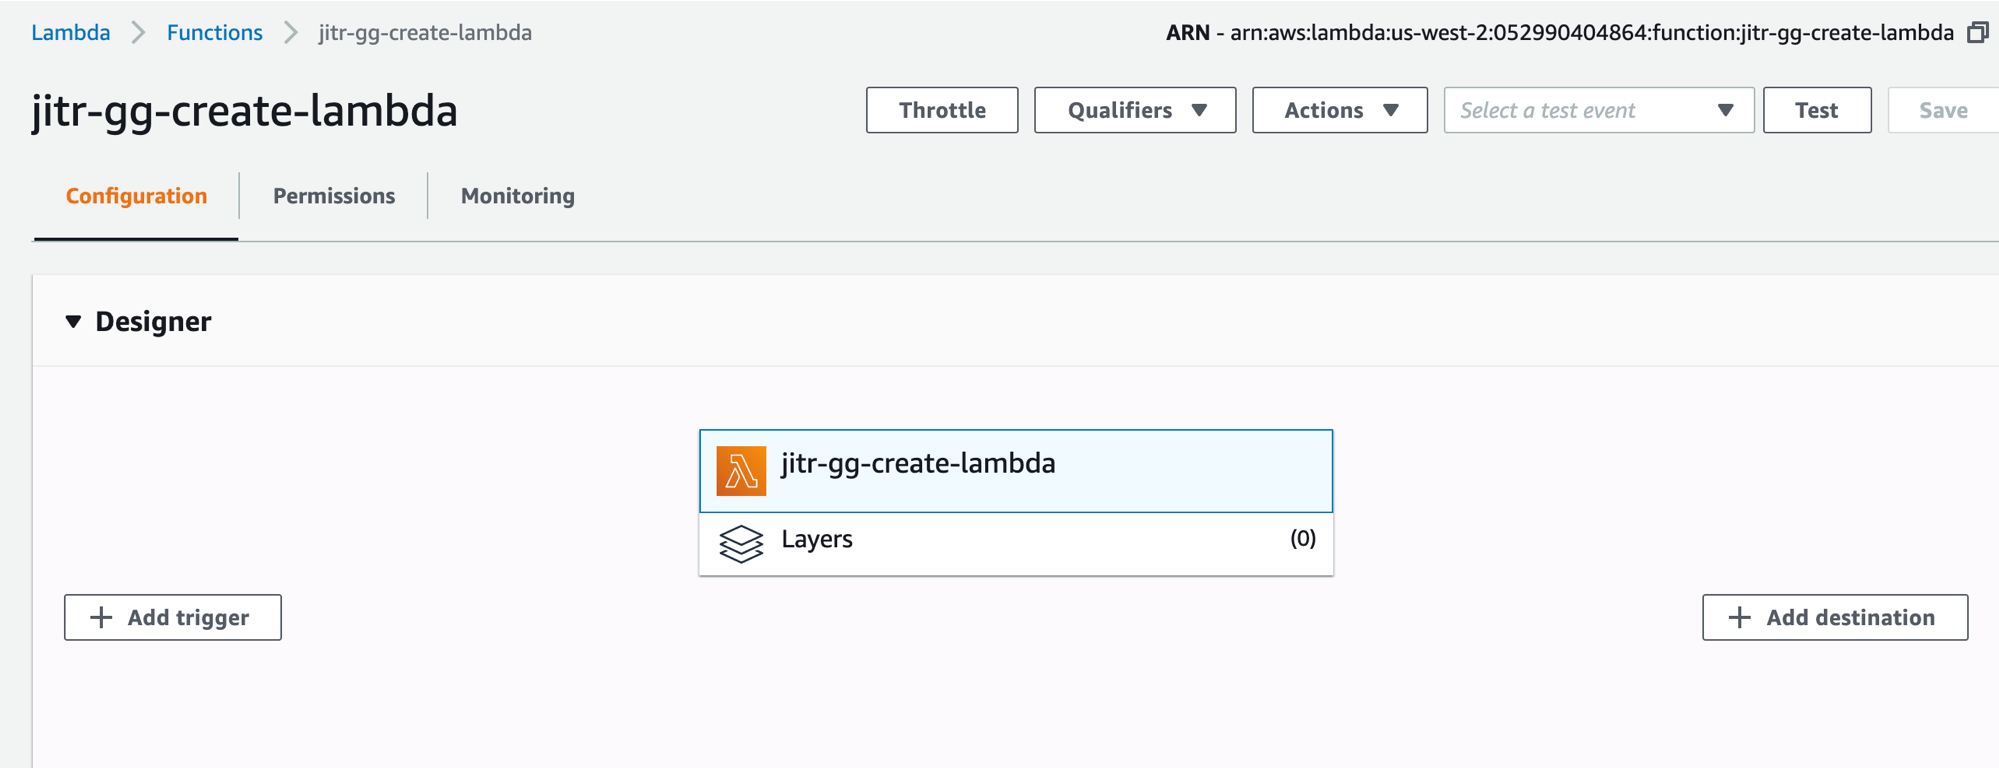
- At this point, a lambdafunction is created, and it should looks like the following
-
- please noted that at this point the lambda function has no trigger source, it will be updated after the IoT rule is created
- please noted that at this point the lambda function has no trigger source, it will be updated after the IoT rule is created
- Scroll down to the AWS Lambda function code section of the page. Replace the existing code with the following code, and click Save ``` import json import boto3 import time from botocore.exceptions import ClientError
iot = boto3.client(‘iot’, region_name=’ap-southeast-1’) dynamodb = boto3.client(‘dynamodb’) gg = boto3.client(‘greengrass’, region_name=’ap-southeast-1’)
policy = { “Version”: “2012-10-17”, “Statement”: [ { “Effect”: “Allow”, “Action”: [ “iot:Publish”, “iot:Subscribe”, “iot:Connect”, “iot:Receive” ], “Resource”: [ “” ] }, { “Effect”: “Allow”, “Action”: [ “iot:GetThingShadow”, “iot:UpdateThingShadow”, “iot:DeleteThingShadow” ], “Resource”: [ “” ] }, { “Effect”: “Allow”, “Action”: [ “greengrass:” ], “Resource”: [ “” ] } ] } def delete_cert_and_policy(deviceId, principals): for principal in principals: certificateId = principal.split(‘/’)[-1] policies = iot.list_attached_policies(target=principal) for policy in policies[‘policies’]: iot.detach_policy( policyName=policy[‘policyName’], target=principal ) iot.delete_policy(policyName=policy[‘policyName’]) iot.update_certificate( certificateId=certificateId, newStatus=’INACTIVE’ ) iot.detach_thing_principal( thingName=deviceId, principal=principal ) while True: resp = iotClient.list_thing_principals( thingName=deviceId ) if not resp[‘principals’]: break time.sleep(1)
def lambda_handler(event, context): global policy print(“event: “, event) certId = event[‘certificateId’] response = iot.describe_certificate( certificateId=certId) certificatePem = response[‘certificateDescription’][‘certificatePem’] print(certificatePem) deviceId = ‘device_jitr’ + ‘_0309_workshop’ certificateArn = response[‘certificateDescription’][‘certificateArn’]
# create thing
try:
response = iot.describe_thing(
thingName=deviceId
)
except ClientError as e:
response = iot.create_thing(
thingName=deviceId
)
thingArn = response['thingArn']
# delete certificates which are attached to this thing
response = iot.list_thing_principals(
thingName=deviceId
)
if response['principals']:
delete_cert_and_policy(deviceId, response['principals'])
# generate keys and certificate
response = iot.describe_certificate(
certificateId=certId)
certificatePem = response['certificateDescription']['certificatePem']
certificateArn = response['certificateDescription']['certificateArn']
# attach certificate to thing
policyDocument = json.dumps(policy)
iot.attach_thing_principal(
thingName=deviceId,
principal=certificateArn
)
try:
# create a policy for thing
policyName = 'Policy_' + deviceId
iot.create_policy(
policyName=policyName,
policyDocument=policyDocument
)
except ClientError as e:
print('policy exists', policyName)
raise(e)
try:
# attach policy to certificate
iot.attach_policy(
policyName=policyName,
target=certificateArn
)
except ClientError as e:
print('attach policy failed')
iot.update_certificate(
certificateId=certId,
newStatus='ACTIVE'
)
# creating Greengrass group steps:
# 1. create_thing as avoce
# 2. create_core_definition
# 3. create group
# 4. create group version
groupName = 'jitr_group_' + deviceId
try:
response = gg.get_group(GroupId=groupName)
print(groupName, 'exists')
except ClientError as e:
print(groupName, 'not exists, create one')
coreDefDeviceId = 'gg_core_' + deviceId
response = gg.create_core_definition(
InitialVersion={
'Cores': [
{
'CertificateArn': certificateArn,
'Id': deviceId,
'SyncShadow': True,
'ThingArn': thingArn
},
]
},
Name=coreDefDeviceId
)
print(response)
CoreDefinitionVersionArn = response['LatestVersionArn']
print(CoreDefinitionVersionArn)
time.sleep(10)
group_info = gg.create_group(Name=groupName)
group_args = {'GroupId': group_info['Id']}
group_args['CoreDefinitionVersionArn'] = CoreDefinitionVersionArn
grp = gg.create_group_version(
**group_args
)
print(grp)
```
it should look like the following

- Now, scroll down and edit the basic settings, edite and update the Timeout to more then 30 seconds as following:
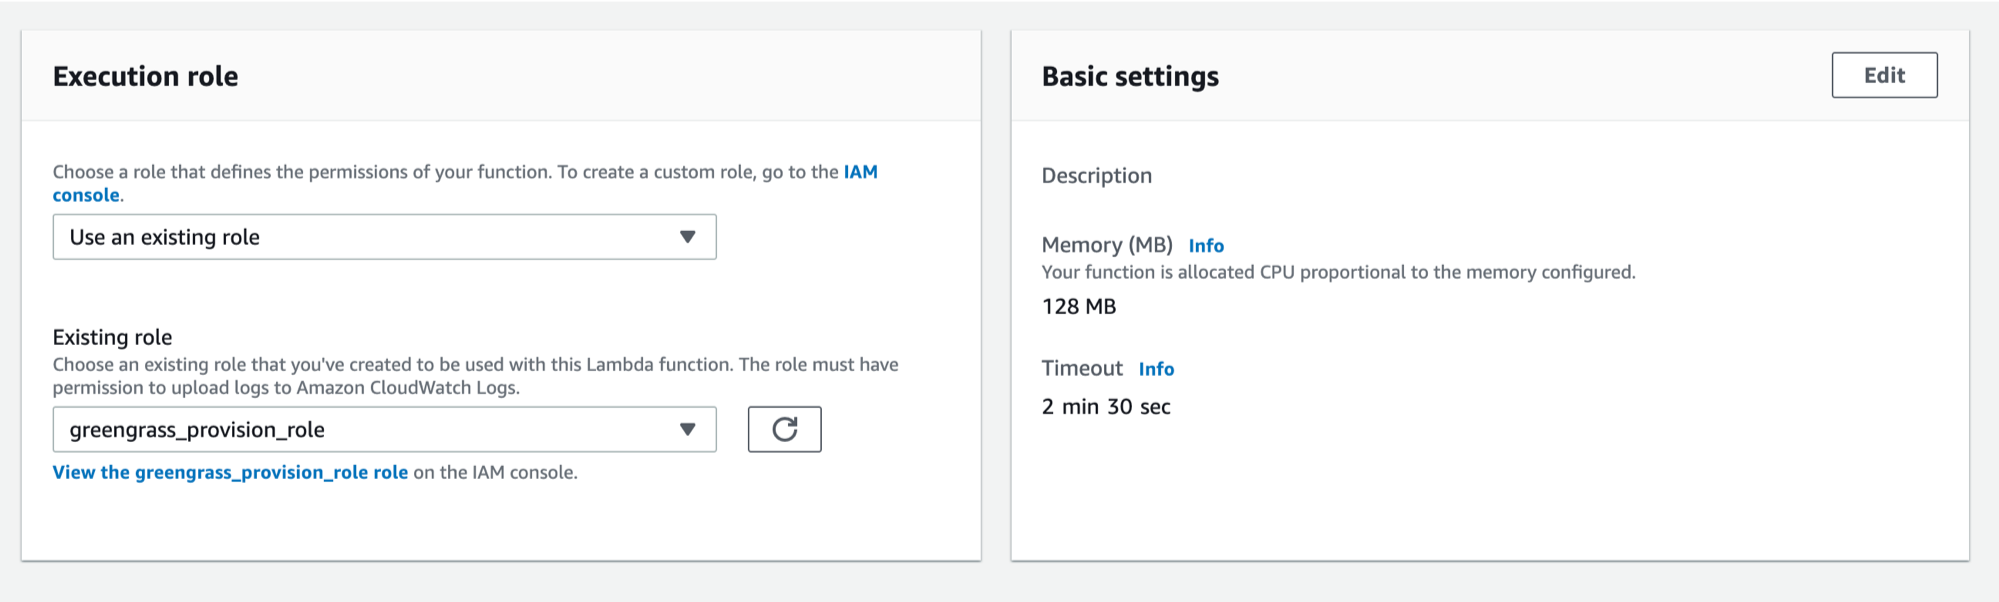 click Save
create a rule(Act) in AWS IoT
Now that you have created an AWS Lambda function, you can create a rule that invokes the function.
- In the AWS IoT console, navigate to Act.
- Choose Create a rule.
- Type a name and description for the rule.
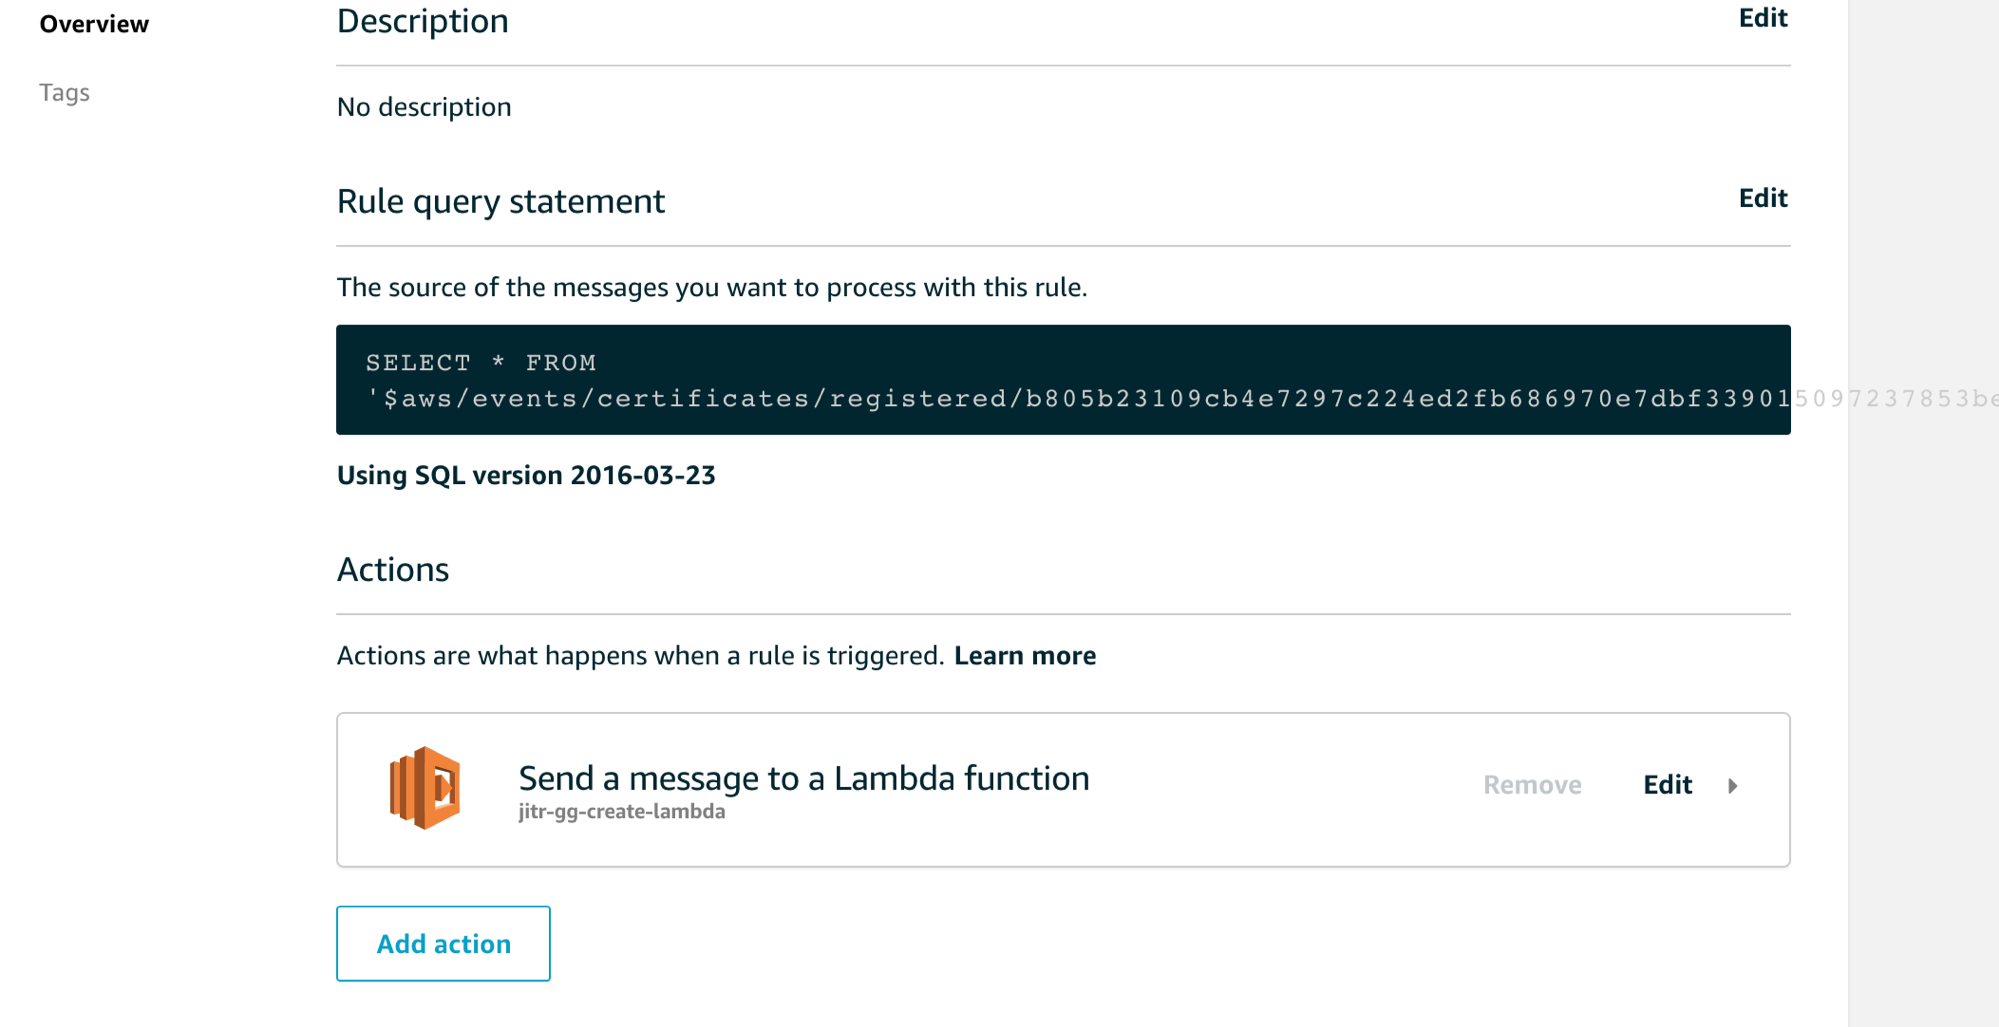
Enter the following settings for the rule:
SQL version: 2016-03-23-beta
Attribute: *
Topic filter: $aws/events/certificates/registered/
Note: Replace with the ID of the registered CA certificate. - For Choose an action, choose Insert this message into a code function and execute it (AWS Lambda).
- From Function name, choose your AWS Lambda function name you’ve created in the previous section(jitr-gg-create-lambda), and then choose Add action.
- Choose Create to create your AWS Lambda function.
it shoud look like the following
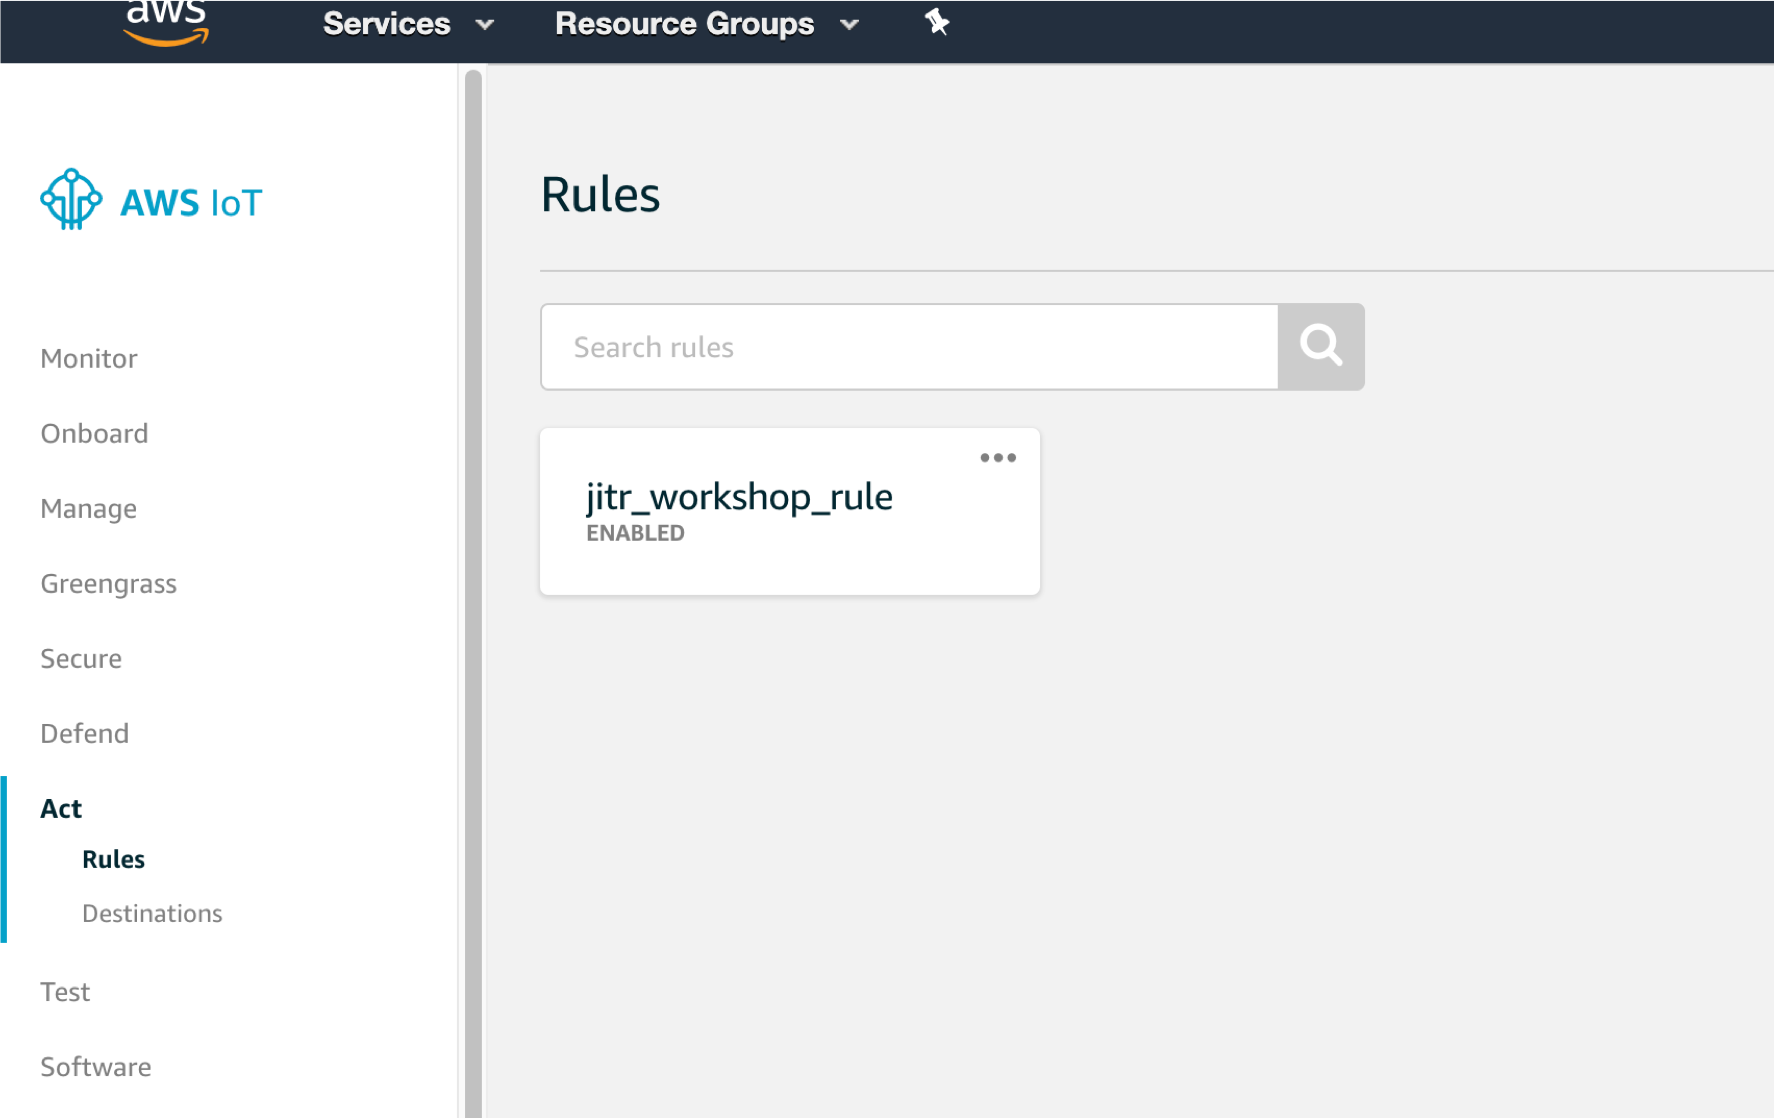
in the rule page:
 in the Act page
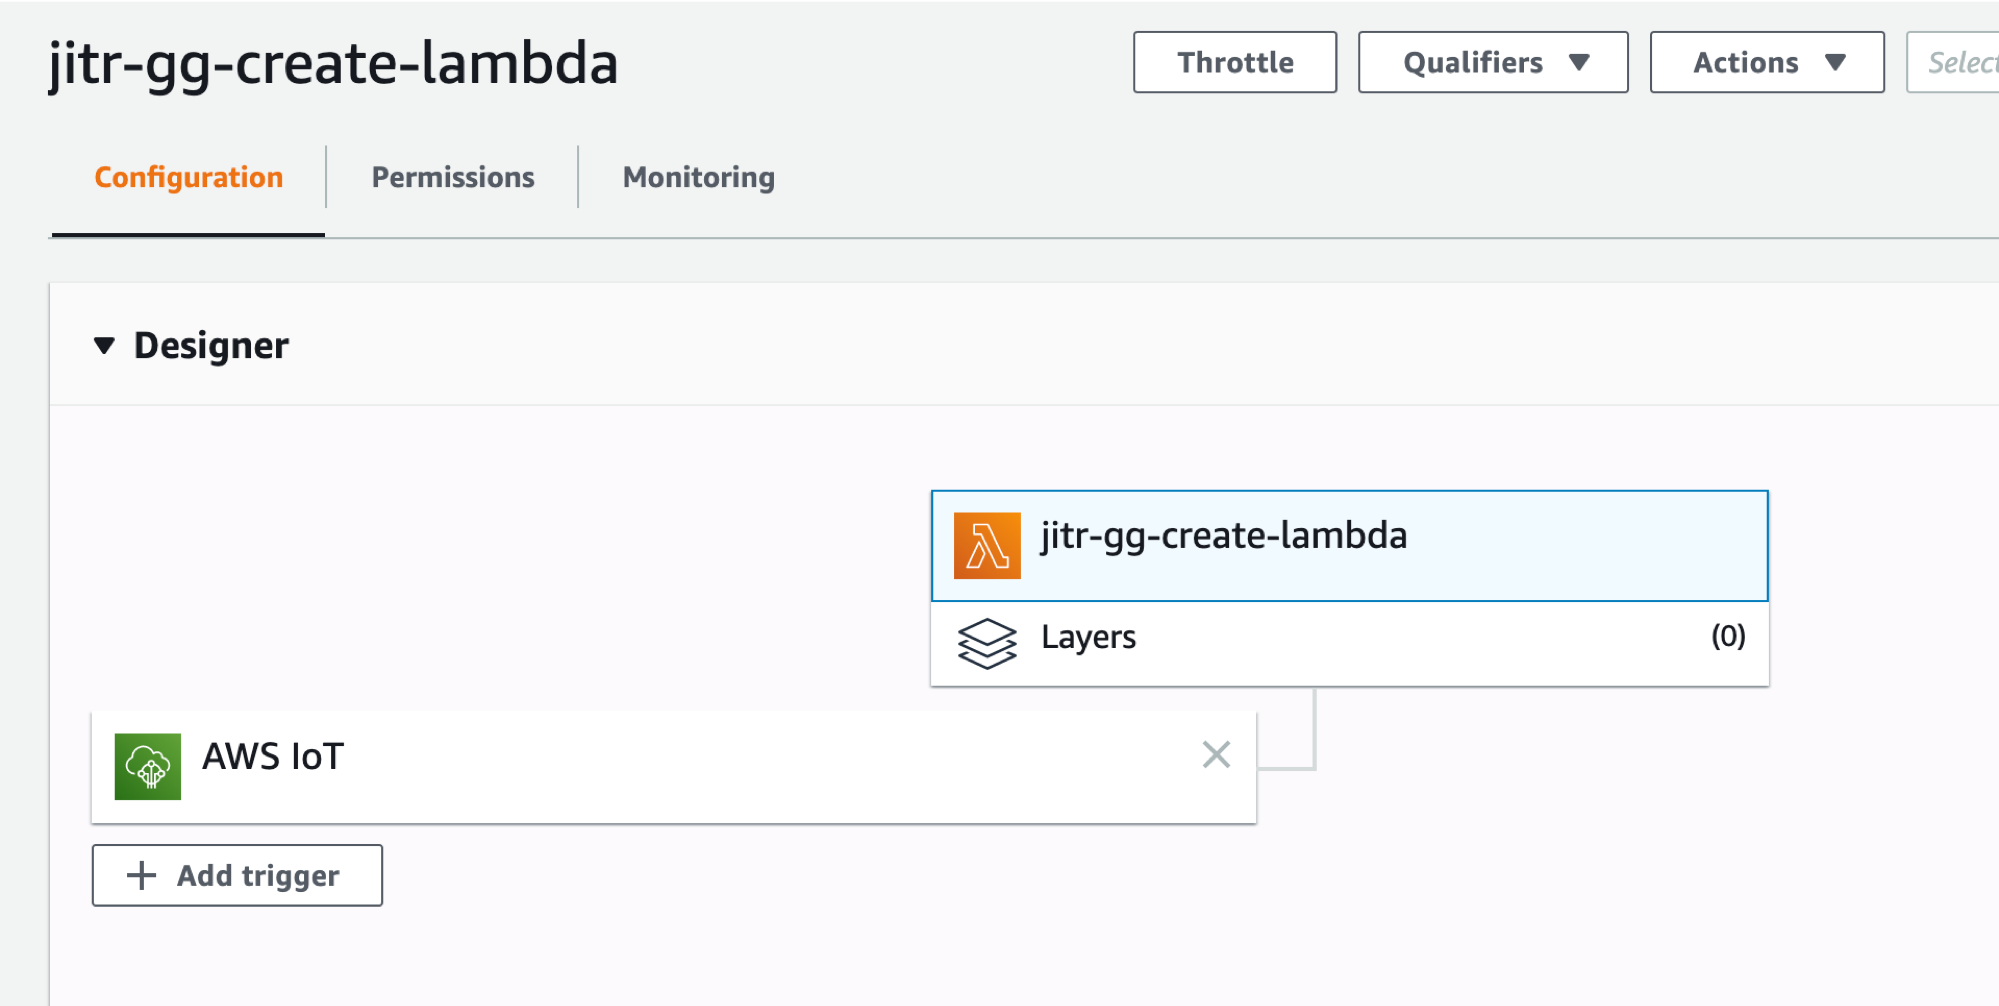
You can also navigate back to the lambda function you’ve created, you will noticed that the lambda function has a trigger source with AWS IoT
Install and start greengrass with the certs you’ve created in step 3
Now that the device certs and lambda function and rule is ready, we can now start to enable Greengrass with this setup!
get back to your EC2 terminal:
and you will do the following things:
- download the greengrass sdk and rootCA
- create a config.json file
- move the certs created previously into the greengrass/certs folder
- start greengrass
download the greengrass sdk
on EC2 terminal, use the following cmd to download the latest greengrass sdk
$ wget https://d1onfpft10uf5o.cloudfront.net/greengrass-core/downloads/1.10.0/greengrass-linux-x86-64-1.10.0.tar.gz
untar and install it into the OS
sudo tar -xzvf greengrass-OS-architecture-1.10.0.tar.gz -C /
Download rootCA
cd /greengrass/certs/
sudo wget -O root.ca.pem https://www.amazontrust.com/repository/AmazonRootCA1.pem
Add ggc_user and ggc_group
sudo adduser --system ggc_user
sudo groupadd --system ggc_group
check kernel configureation:
sudo sysctl -a | grep fs.protected
- If hardlinks and softlinks are set to 1, your protections are enabled correctly. if not, use sysctl -p to update it temporory
create a config.json file
here is the config.json template you will create.
- update < region > with the region you are using
- update < accountId > with the region your aws account id
- update < iotHost > with the iotHost endpoint you are using
-
- you can find your endpoint here
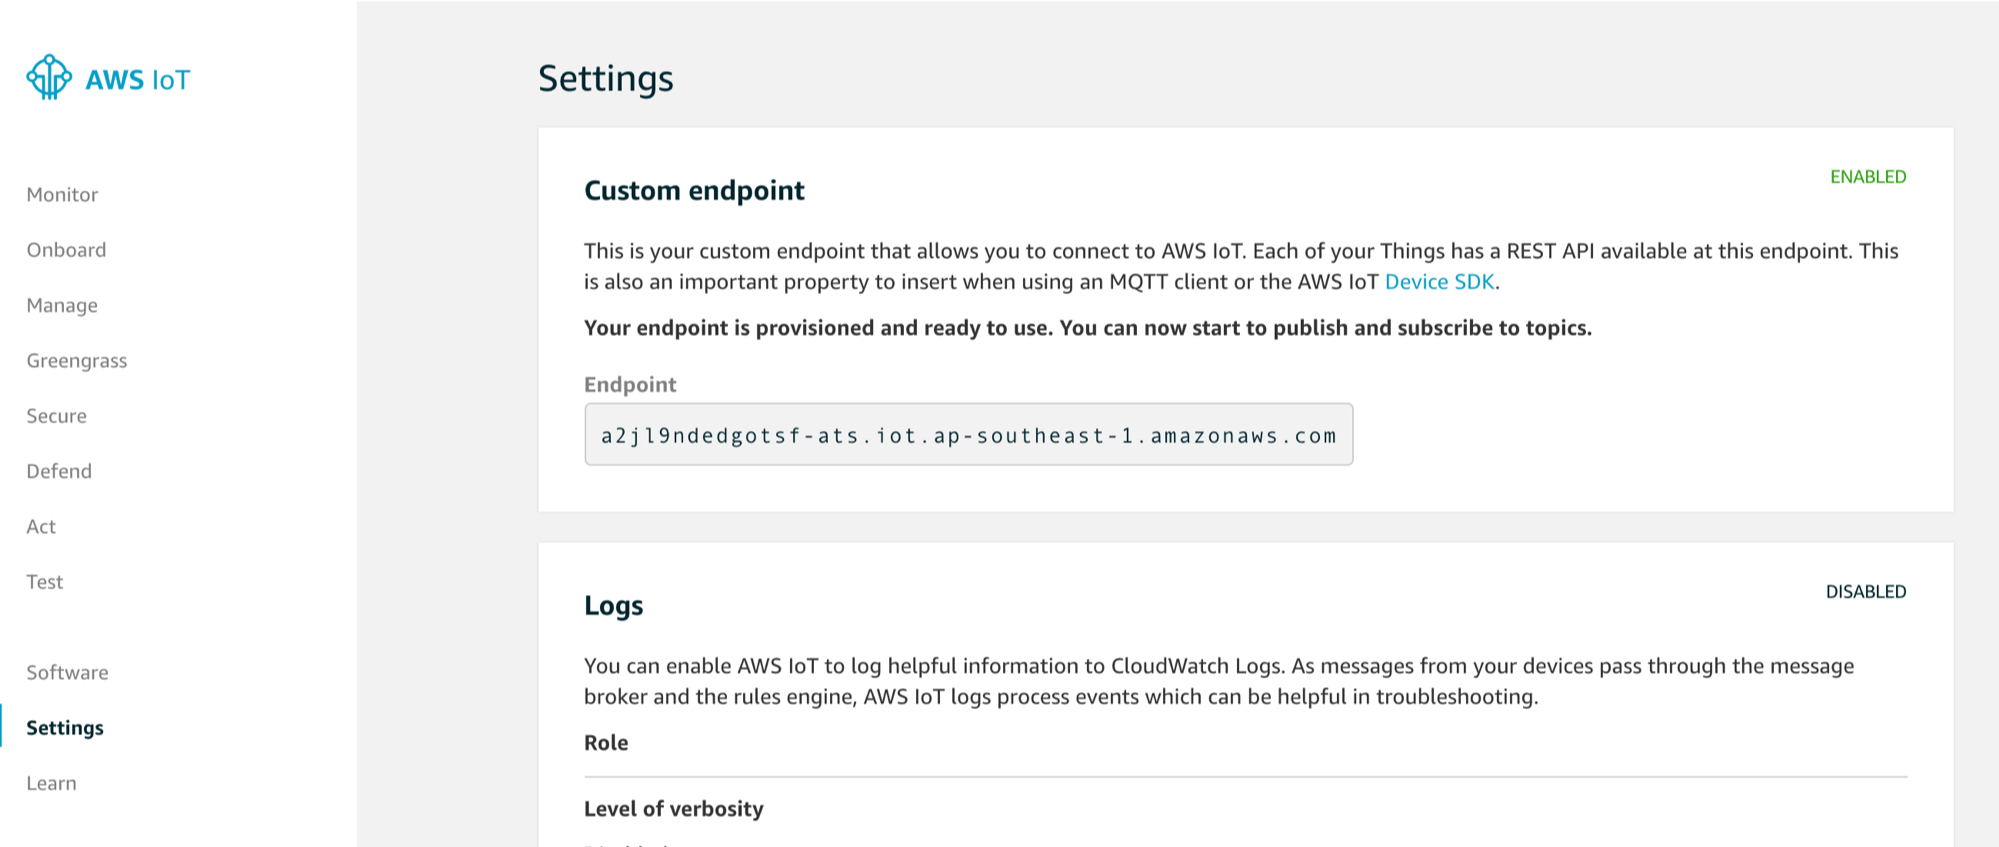
- you can find your endpoint here
- Also please noted that a thing named device_jitr_0309_workshop is will be created by the lambda function, you will need to change it if you’ve modified the lambda function
{
  "coreThing" : {
    "caPath" : "root.ca.pem",
    "certPath" : "jitr.crt",
    "keyPath" : "jitr.key",
    "thingArn" : "arn:aws:iot:<region>:<accountId>:thing/device_jitr_0309_workshop",
    "iotHost" : "<your_iot_endpoint>",
    "ggHost" : "greengrass-ats.iot.<region>.amazonaws.com",
    "keepAlive" : 600
  },
  "runtime" : {
    "cgroup" : {
      "useSystemd" : "yes"
    }
  },
  "managedRespawn" : false,
  "crypto" : {
    "principals" : {
      "SecretsManager" : {
        "privateKeyPath" : "file:///greengrass/certs/jitr.key"
      },
      "IoTCertificate" : {
        "privateKeyPath" : "file:///greengrass/certs/jitr.key",
        "certificatePath" : "file:///greengrass/certs/jitr.crt"
      }
    },
    "caPath" : "file:///greengrass/certs/root.ca.pem"
  }
}
- use vim or your favirote editor to update the config.json on EC2 terminal
- After updated the config.json, use the following cmd to put it into /greengrass/config/
sudo cp config.json /greengrass/config/config.json
You might noticed that the certPath and the keyPath is using jitr., so next step we will change the certs names we’ve created previously into jitr.
move the certs created previously into the greengrass/certs folder
use the following cmd to move the certs into /greengrass/certs on your EC2 termnial
cp deviceCertAndCACert.crt jitr.crt; cp deviceCert.key jitr.key; sudo cp jitr* /greengrass/certs/
Start greengrass
now you can start greengrass with the following cmd and verifiy the results later
cd /greengrass/ggc/core/
sudo ./greengrassd restart
it should sucess message as below
Waiting
Stopped greengrass daemon, exiting with success
Setting up greengrass daemon
Validating hardlink/softlink protection
Waiting for up to 1m10s for Daemon to start

Greengrass successfully started with PID: 20321
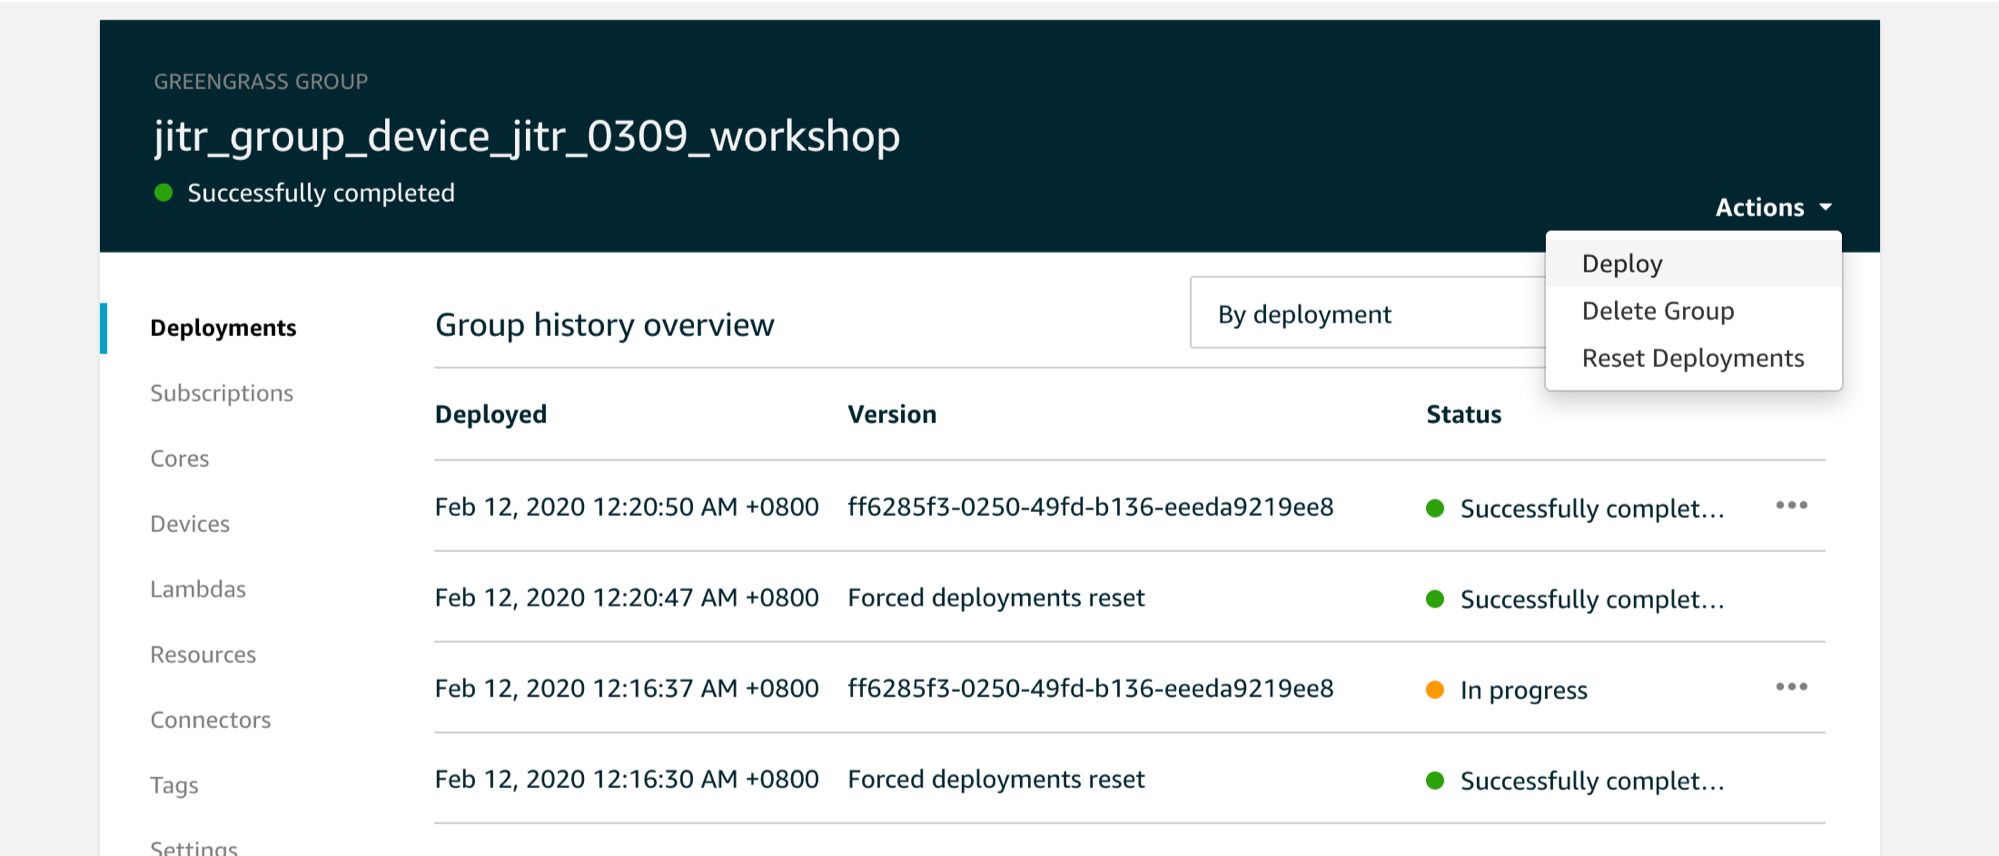
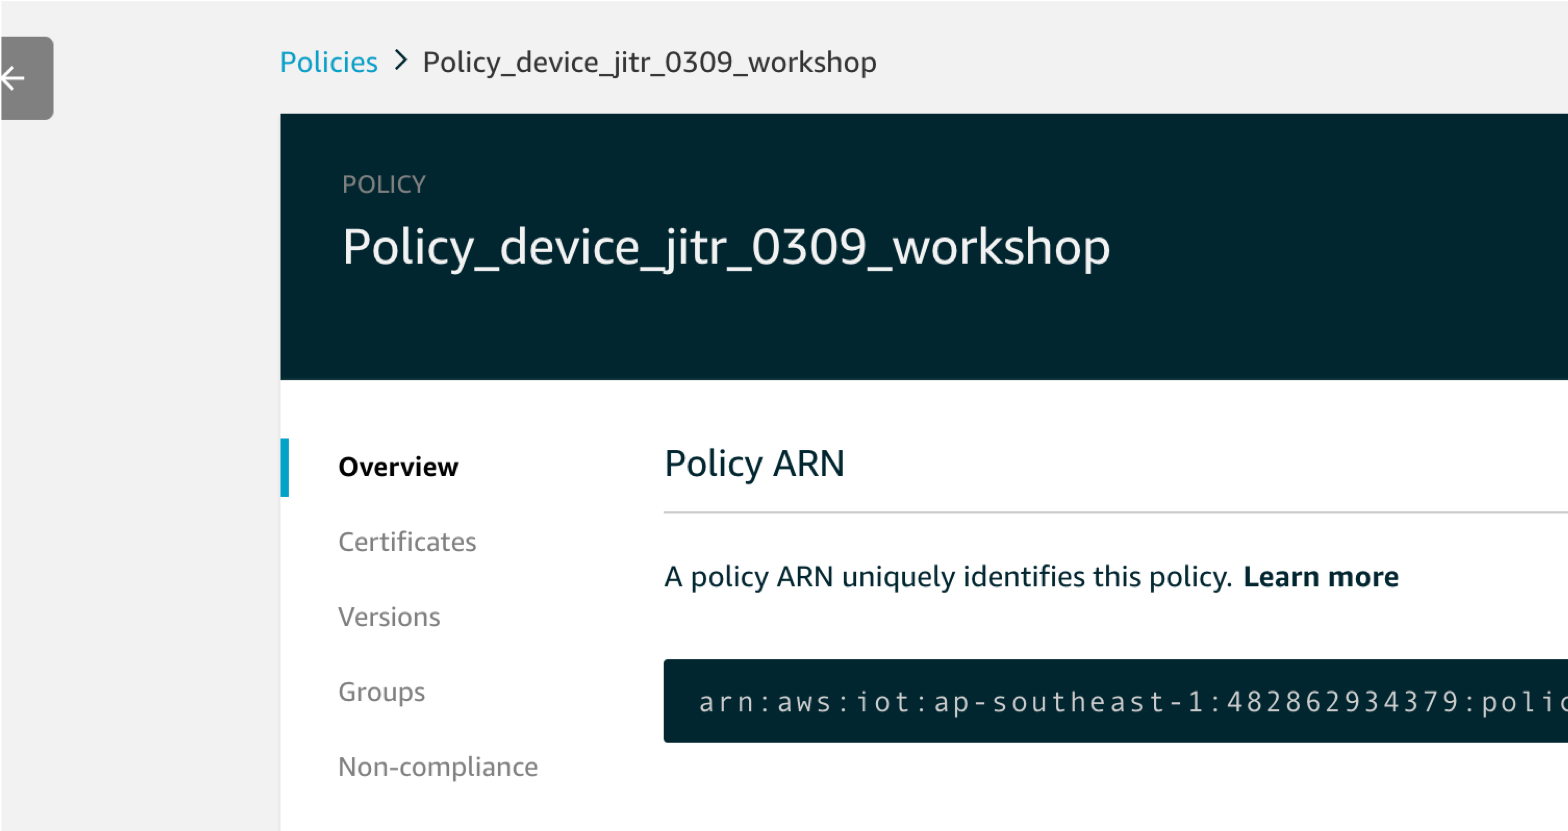
Verifiy the group is successfully provisioned and deploy it
check if policy Policy_device_jitr_0309_workshop is created
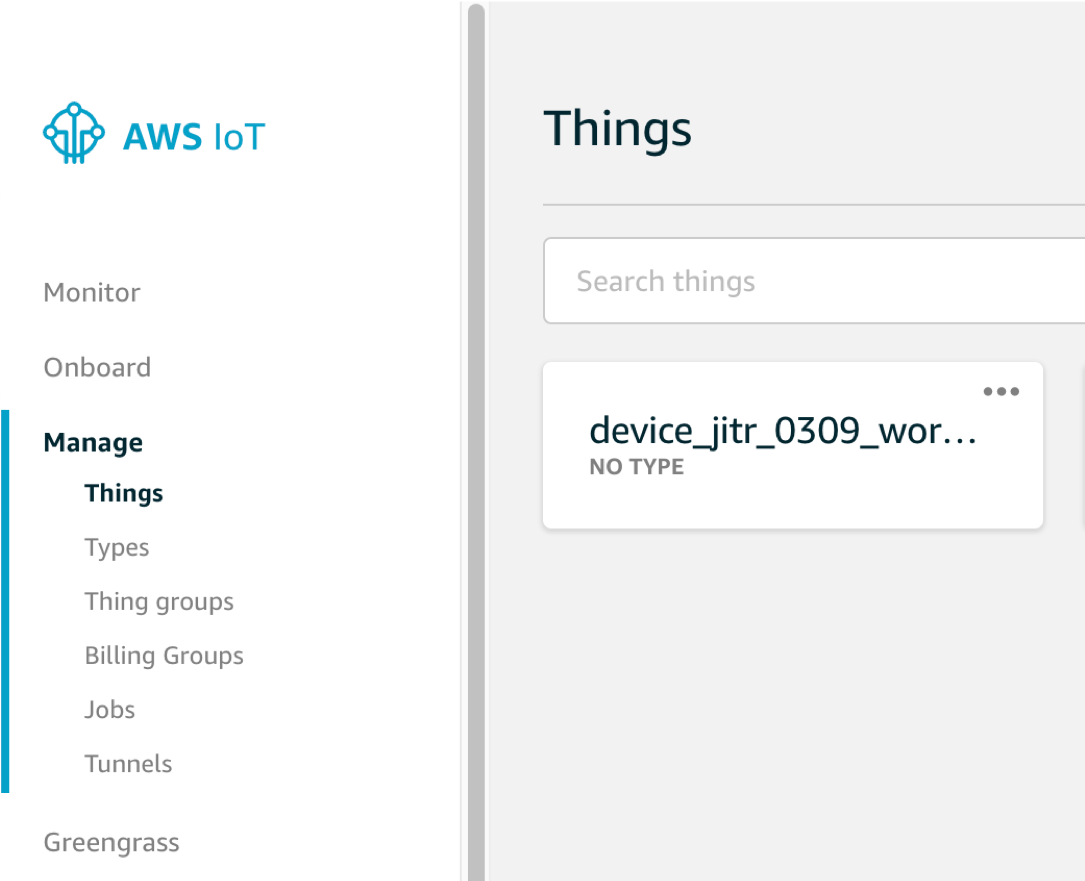
check if thing name device_jitr_0309_workshop is created
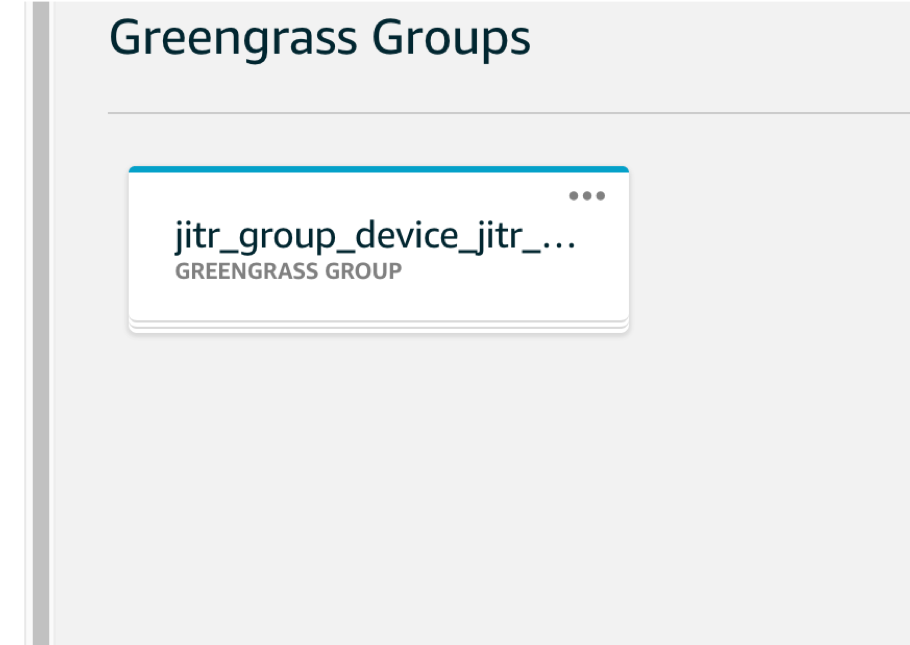
check if greengrass group jitr_group_device_jitr_0309_workshop is created
Fianlly deploy the greengrass group and it should deploy successfully